Grading
Codio offers the following grading features:
Assign Grade - Manually review student projects and assign a grade.
Grading Moderation - Other instructors review grades already assigned to monitor grading consistency.
Grading Rubric - A two-dimensional grid that provides grading guidance for manually assessing a coding project.
LMS Gradebook Synchronization - Ensures that when grades are released, the data is automatically passed to any LTI enabled LMS platform such as Moodle, Blackboard and Canvas.
Grading process
Once students have completed their assignments, they notify the teacher by using the Education > Mark as Completed menu in the IDE. Instructors can also mark the assignment as complete or change the status to incomplete. Follow these steps to view and grade the assignments:
Open the assignment and view the students who have a check mark to the left of their name in the Completed column. This indicates that they have marked as complete.
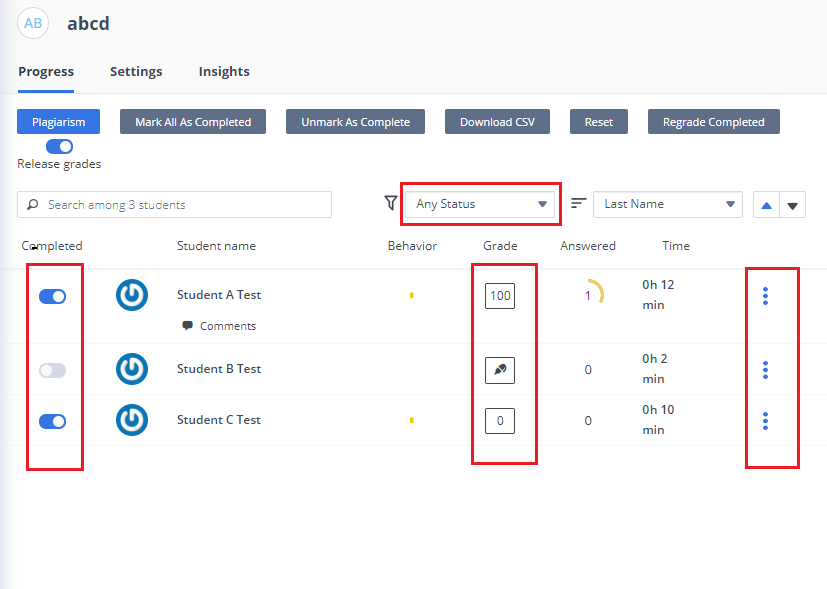
You can click the status drop-down if you want to filter the list of students based on the status of their assignments. For example, Started, Completed or Needs Grading.
Click the three vertical dots in the Actions column and choose Open student’s project to start grading the student’s assignment.
Use one of the following methods to assign the grade:
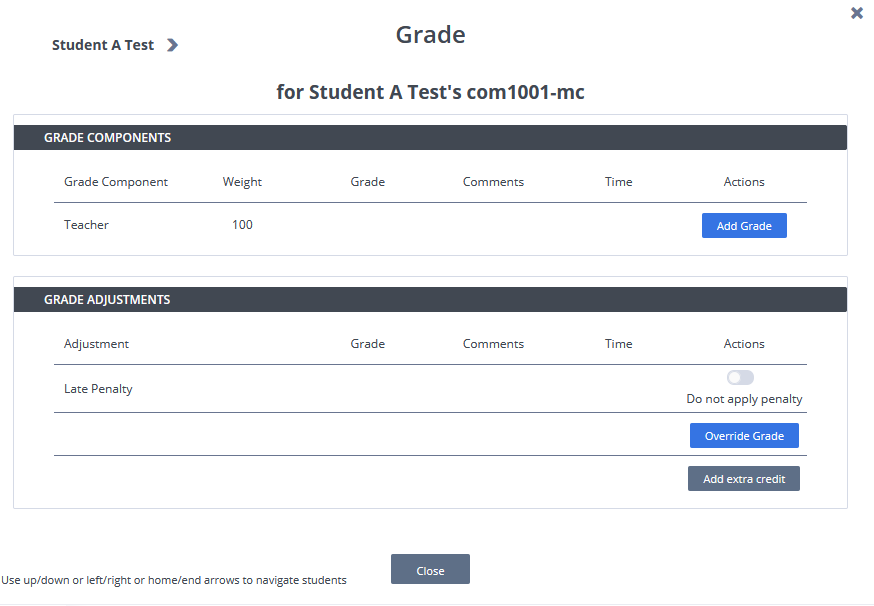
If you have opened the student’s project, click the Grading button.
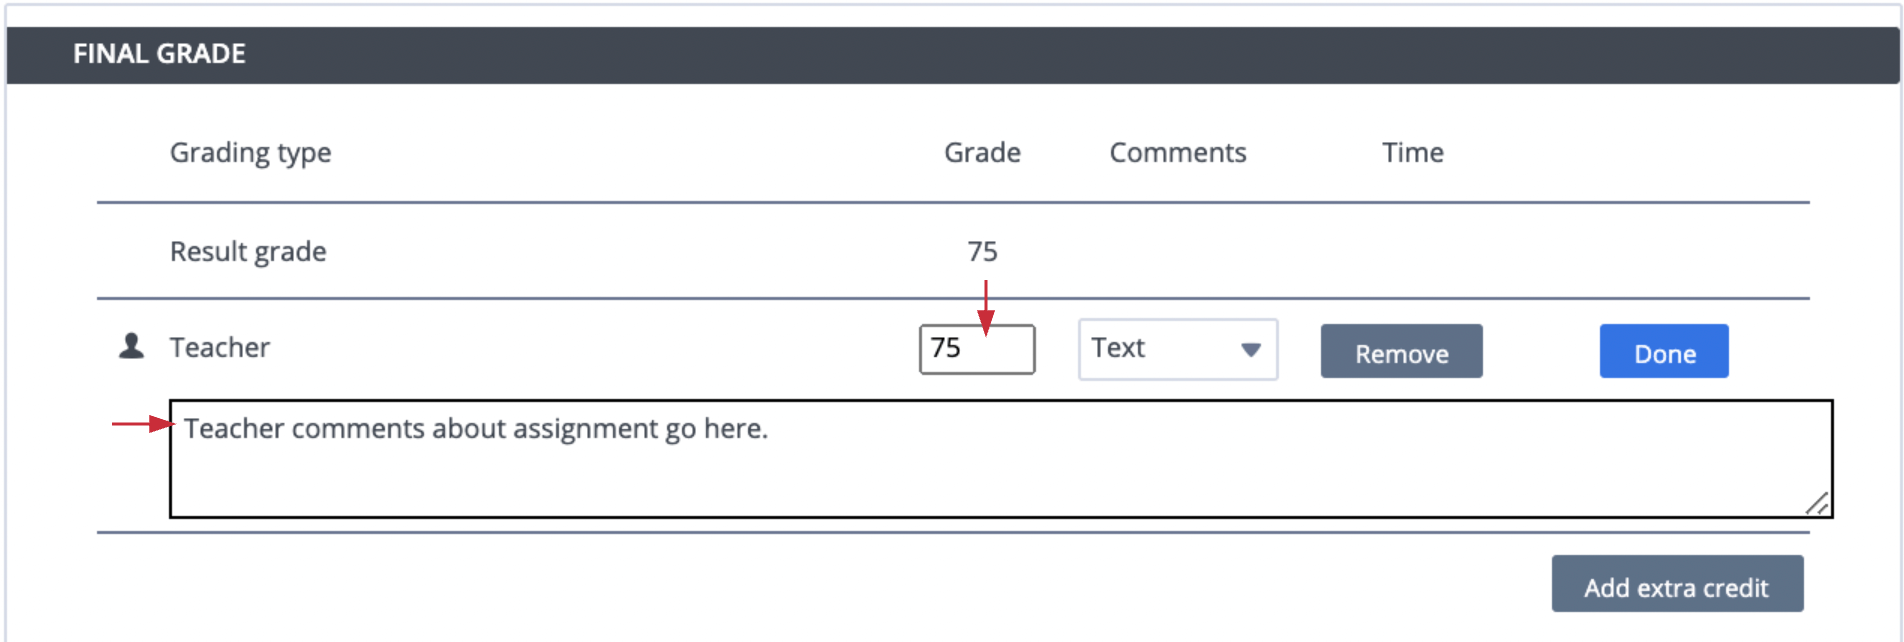
On the Course dashboard, click the item in the Grade column for that student and complete the fields. You can also add comments.
From inside a student’s project, you can jump to next/previous student’s assignment using Next or Previous button at the top.
If there is another assessment that is ungraded in the assignment, the Next Ungraded and Previous Ungraded buttons will appear in the top menu. When clicked, you will be brought to the respective guide page containing the ungraded assessment.

Grading Queue
Information on all students that require grading for all assignments in the course can be seen from the Grading>Queue item in your course.
By default the Grading Queue displays all students’ submission that require grading, organized by module and assignment. You can use the Do Not Group button to sort the list by submission time, with the oldest submission at the top. Other filters can be set as required.
As explained in the previous section, once you open a student’s submission then you can use Next, Previous, Next Ungraded and Previous Ungraded buttons to move to the next/previous student submission or next/previous ungraded assessment in that specific assignment.
Override Grade
If the students assignment has already been graded, another teacher in the course can click Override Grade to manually change the grade with additional comments.
The Override Grade feature can also be used to provide comments at the assignment level. If you do not wish to alter the numeric grade when adding assignment level comments, re-enter it under Grade, add your comment and then select Done.
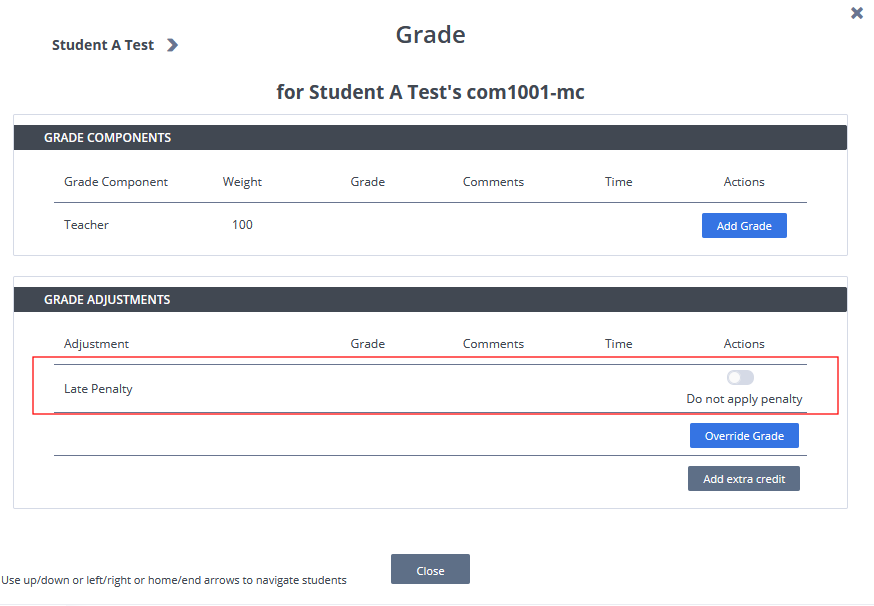
Removing Penalties
In the Grade Adjustments section of the grading screen you can remove penalties by toggling the Do not apply penalty option.
Anonymous grading
Anonymous grading can be set for the course and then students cannot see the names of the teachers who graded their work. The teacher names are hidden in the shared feedback, project, and dashboard.
To enable anonymous grading, follow these steps:
Open the course and select the Grading>Basic Settings tab.
Toggle Anonymous Grading to enable it and then click Save Changes.
Code Commenting
You can add comments to the code so that students can see them when they open the file. To comment on the code, follow these steps:
Open the project and then open the file.
Hover over the left-hand side of the gutter bar and click + to open the comment window.
Enter your comments. You can select multiple lines of code, edit, and delete lines of code.
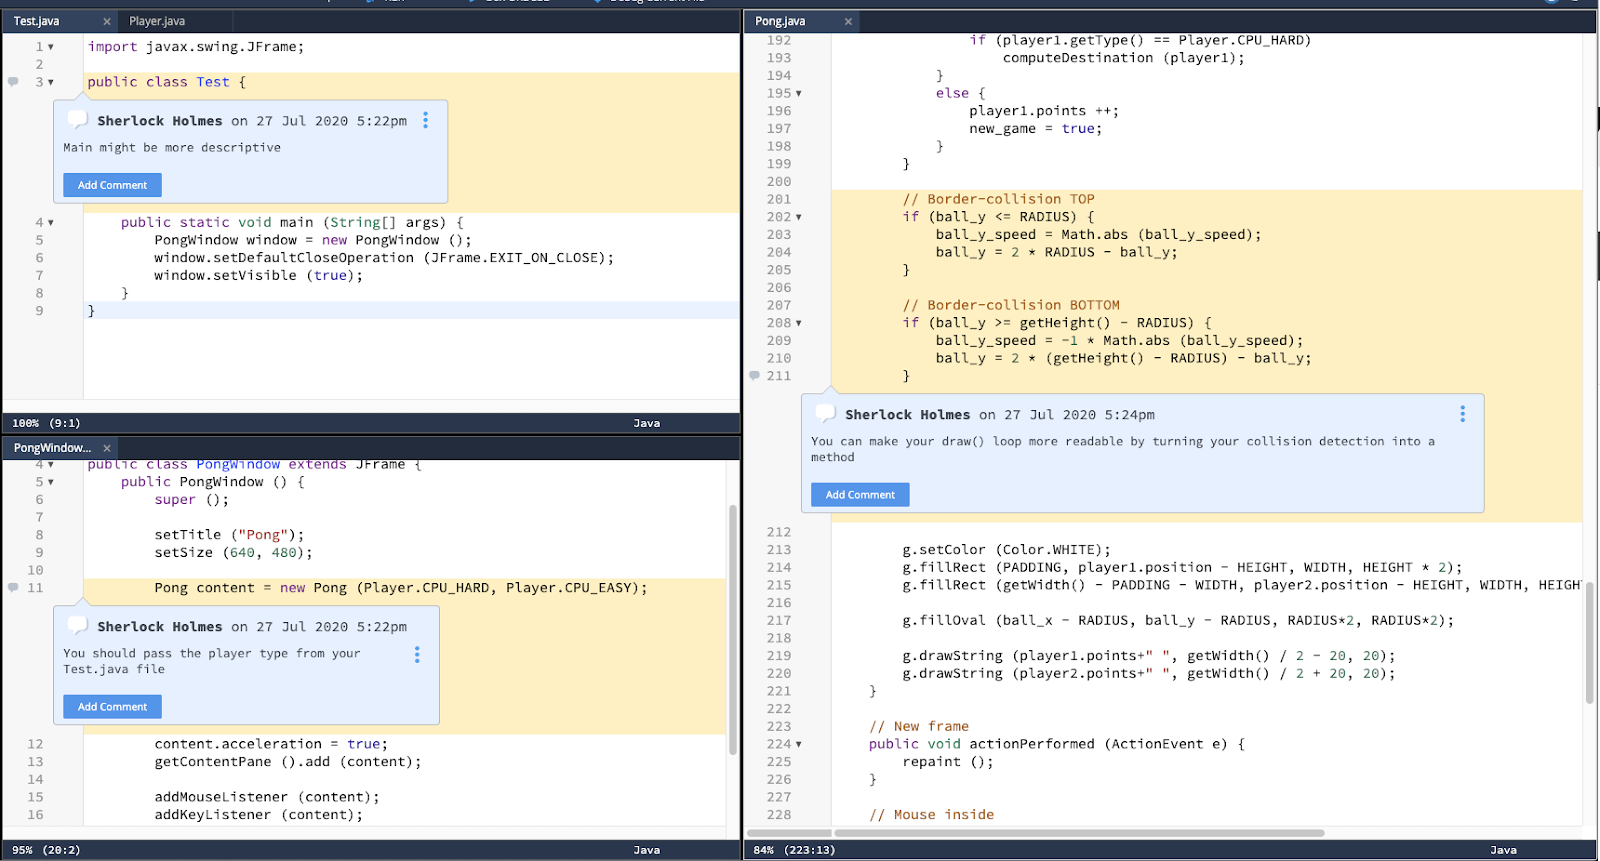
Students can then view the comments from the Education > Code Comments menu. They can also open the file from the comments.

Autograde Failure Notification
You can set autograde failure notification, so whenever the auto-grade script fails for a student submission then you will receive email notification for that.
You can set all teachers in the course to receive notification or you can customize this to set only specific teachers to receive the notification.
To enable this feature:
Open the course and navigate to Grading > Basic Settings.
From Autograde Failure Notification setting, you can choose who should receive the notifications..
If you want to send notifications to all teachers in the course then select Teachers option from the dropdown but if you want to send notifications to only specific teachers then choose Customize option from dropdown and specify their email addressess (one email per line) in the Notification Emails area.
Click Save Changes.