Sense Network
Sense.Education is an AI-based code analysis package to give students feedback on their code submissions and is supported in Codio in the Sense.Network assessment type. Students can submit their work and can view feedback from Sense. They can then review their code and resubmit if One Attempt Only is not enabled.
To help and track students activity through Sense, you can enable a custom script.
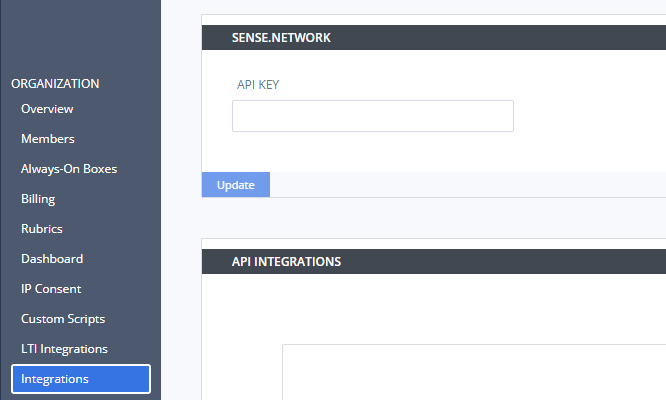
This assessment type is only visible when the sense.network API key is entered on the Organization > Integrations page.
Follow these steps to set up a Sense.Network assessment:
On the General page, enter the following information:
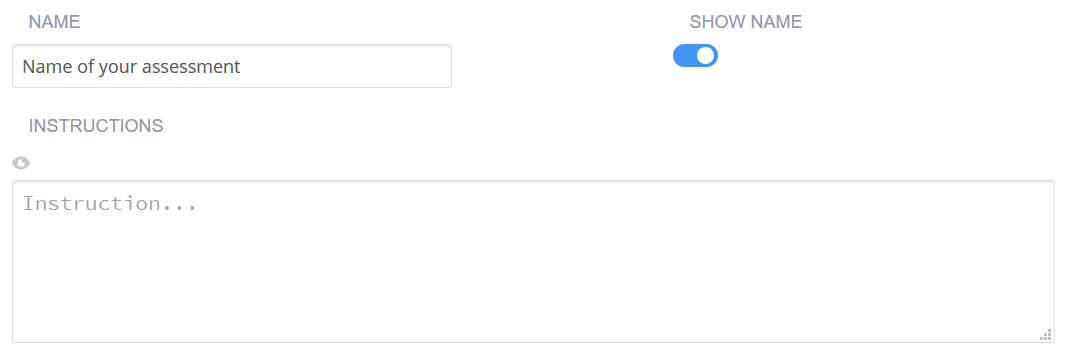
Name - Enter a short name that describes the test. This name is displayed in the teacher dashboard so the name should reflect the challenge and thereby be clear when reviewing.
If you want to hide the name in the challenge text the student sees, toggle the Show Name setting to disable it.
Instructions - Enter the markdown text that is shown to the student.
Click Execution in the navigation pane and complete the following information:
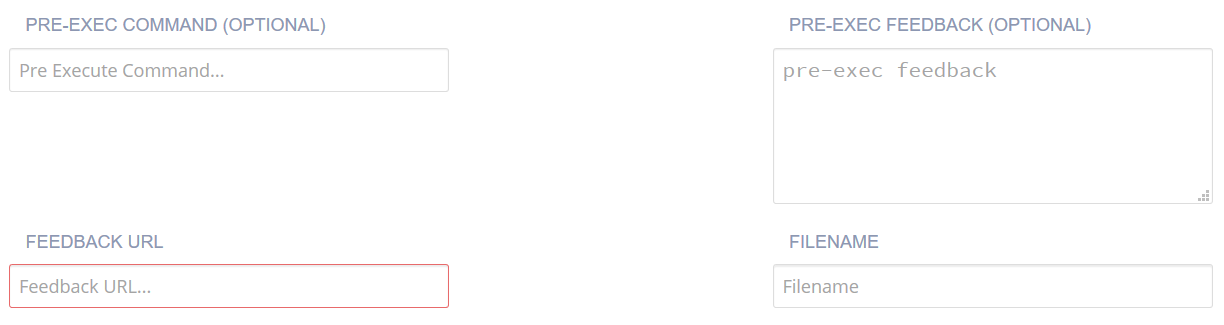
Pre-exec Command (Optional) - Enter the command that executes a check to confirm the code is compiling as required. If you store the assessment scripts in the .guides/secure folder, they run securely so students cannot see the script or the files in the folder. The files can be dragged and dropped from the File Tree into the field to automatically populate the necessary execution code:
Pre-exec Feedback (Optional) - Used to show feedback if the Pre-exec Command fails; otherwise it shows pre-exec output.
Sense Feedback URL (Required) - Enter the feedback URL used to extract assignment id.
Filename (Optional) - Enter the path to the file to pass. If empty, the currently opened file is sent.
Click Grading in the navigation pane and complete the following fields:

Gradable - Toggle to enable if the asessment is to be used within the grade total for the assignment. If disabled, students can be given feedback on their submission for this assessment without it being graded.
Note
The Rationale does not return anything to the student if the assignment is not gradable. When enabled, each submission overrides any previous submissions for grading purposes.
Points - Enter the score if the student selects the correct answer. You can choose any positive numeric value. If this is an ungraded assessment, enter zero (0).
One Attempt Only - Toggle to enable if you want to restrict the student to only answering the question once. If disabled, students can edit their answer until the assignment is marked as completed.
Show Rationale to Students - Toggle to enable if you want both the answer and the rationale for the answer to the student.
Rationale - Enter guidance for the assessment. This is visible to the teacher when the project is opened in the course or when opening the student’s project. This guidance information can also be shown to students after they have submitted their answer and when they reload the assignment after marking it as completed.
Click Metadata in the left navigation pane and complete the following fields:
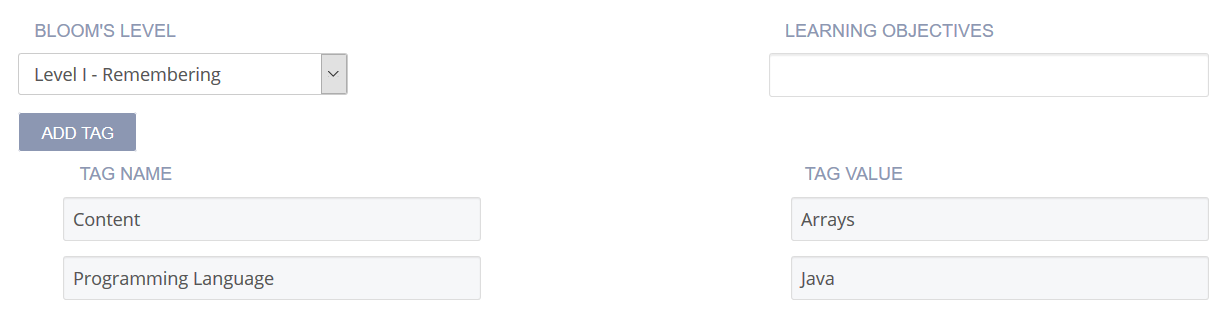
Bloom’s Level - Click the drop-down and choose the level of Bloom’s Taxonomy: https://cft.vanderbilt.edu/guides-sub-pages/blooms-taxonomy/ for the current assessment.
Learning Objectives specific educational goal of the current assessment. Typically, objectives begin with Students Will Be Able To (SWBAT). For example, if an assessment asks the student to predict the output of a recursive code segment, then its Learning Objectives could be SWBAT follow the flow of recursive execution.
Tags - By default, Content and Programming Language tags are provided and required. To add another tag, click Add Tag and enter the name and values.
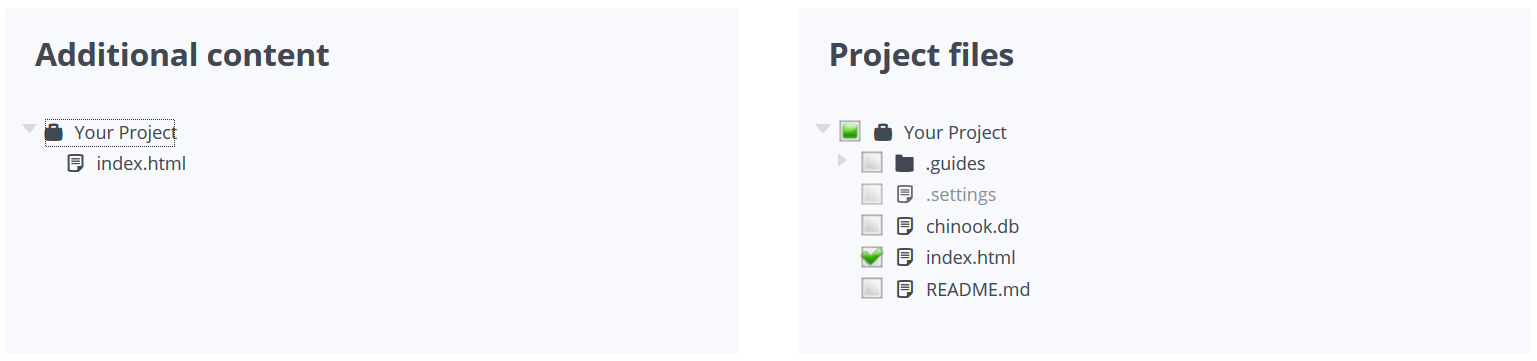
Click Files in the left navigation pane and check the check boxes for additional external files to be included with the assessment. The files are then included in the Additional content list.
Click Create to complete the process.