Free Text
Free text assessments allow students to answer questions in their own words. This type of assessment is recommended for math assessments since it allows for LaTeX formatting. Teachers are then able to review and manually grade their answers.
Assessment Auto-Generation
Assessments can be auto-generated using the text on the current guides page as context. For more information about generating assessments, see the AI assessment generation page.
Assessment Manual Creation
Follow these steps to set up a free text assessment manually. For more information on General, Metadata (optional), and Files (optional), see Assessments.
Complete General.
Click Grading in the navigation pane and complete the following fields:
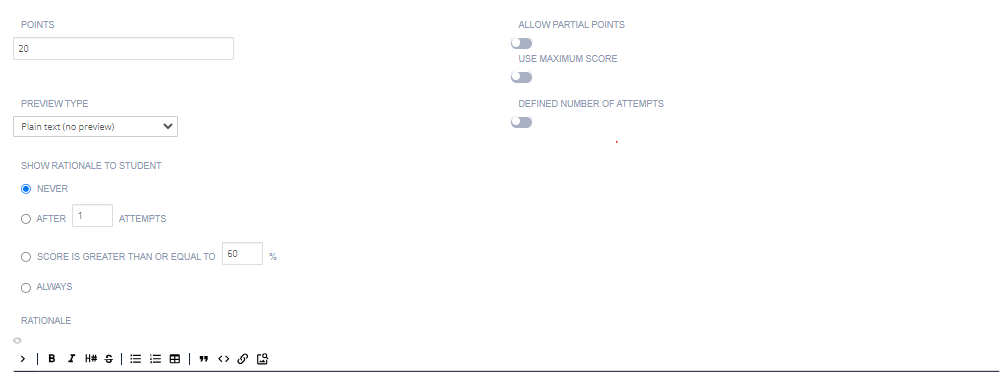
Points - Enter the score for correctly answering the question. You can choose any positive numeric value. If this is an ungraded assessment, enter zero (0).
Partial Points - Toggle to enable a percentage of total points to be awarded based on the percentage of correct answers. Once you enable this, you can add rubric items. Rubric items are negative points that will be subtracted from the total score.
Preview Type - Choose the format for student input (plaintext, markdown, or LaTeX). LaTeX is useful when students need to enter mathematical formulas in their answers. The following options are available:
Format Type |
Description |
|---|---|
Plaintext |
Students enter ordinary text with no markdown formatting; there is no preview window. |
Plaintext + LaTeX |
Students enter plaintext with no markdown formatting but offers support for LaTeX commands. A preview window is available where students can see the rendered LaTeX output. |
Markdown + LaTeX |
Students enter markdown that also offers support for LaTeX commands. A preview window is available where students can see the rendered markdown with LaTeX output. |
Define Number of Attempts - Enable to allow and set the number of attempts students can make for this assessment. If disabled, the student can make unlimited attempts.
Show Rationale to Students - Toggle to display the rationale to students. This guidance information will be shown after they have submitted their answer and whenever they view the assignment after marking it as completed. You can control the display by selecting Never, After x attempts, If score is ≥ x% of total, or Always.
Rationale - Enter guidance for the assessment. This is visible to the teacher when the project is opened in the course or when viewing the student’s project. It can also be shown to students after submission or when they revisit the assignment after marking it as completed.
Click Create to complete the process.
Grading Free Text Assessments
To review and grade answers given by students in a free text assessment, follow these steps:
Select the assignment.
Find the student you want to grade and click the number under Points to view all assessments in the assignment.

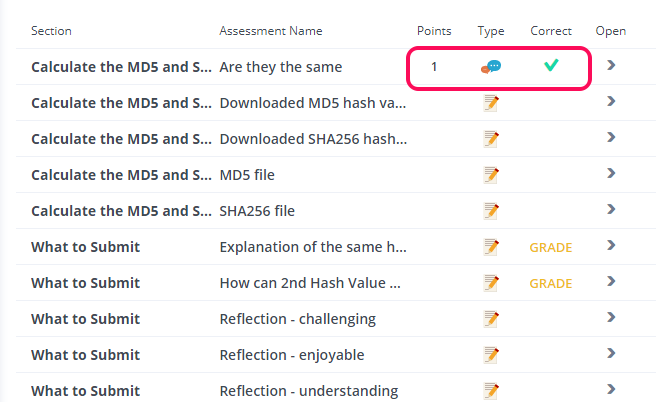
You can identify the free text assessments by the following icon in the Type column:

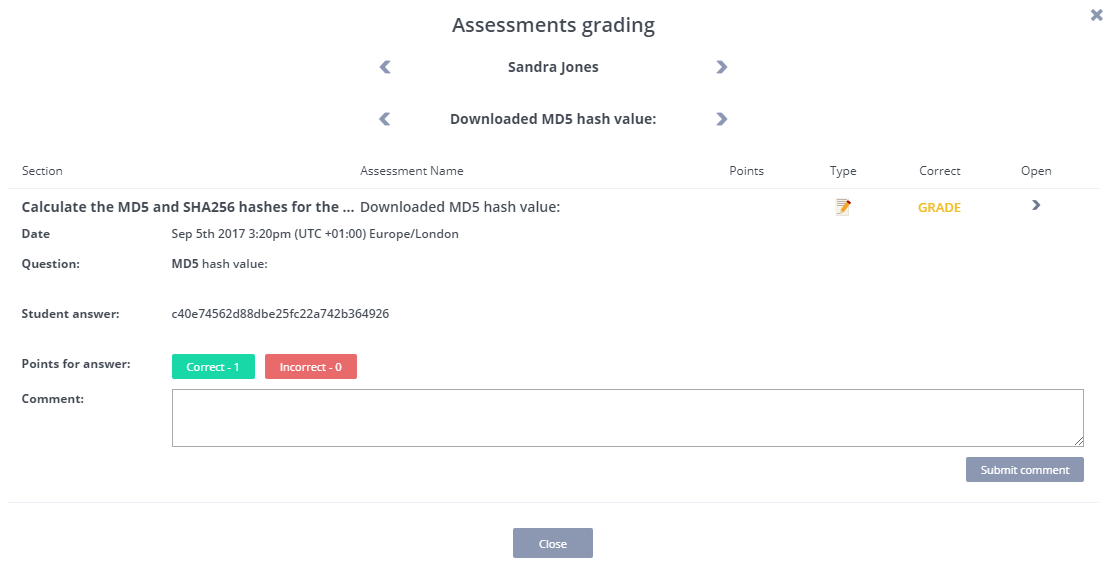
Click any line to view the question and the answer submitted by the student.
In the Points for answer field, perform one of the following depending on whether Allow Partial Points was enabled or disabled for the question:
If Allow Partial Points was disabled, click Correct or Incorrect:
If Allow Partial Points is enabled, assign points for the answer up to the maximum allowed. You can also add rubric items and specify the point value for each:
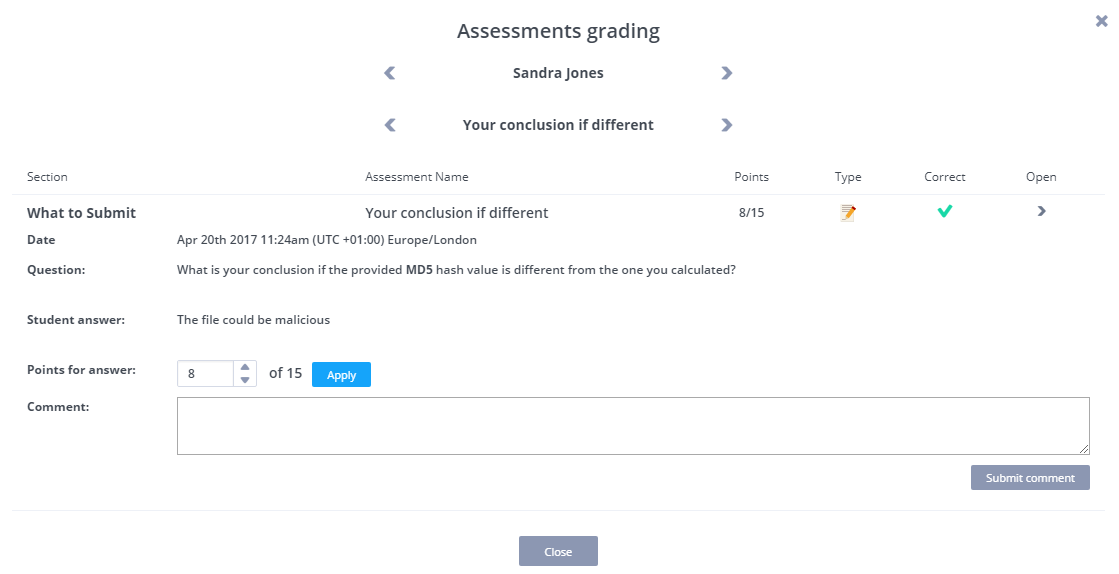
In the Comments field, enter any information about the grade, which can be viewed by the student when the grade is released, and then click Submit Comment.
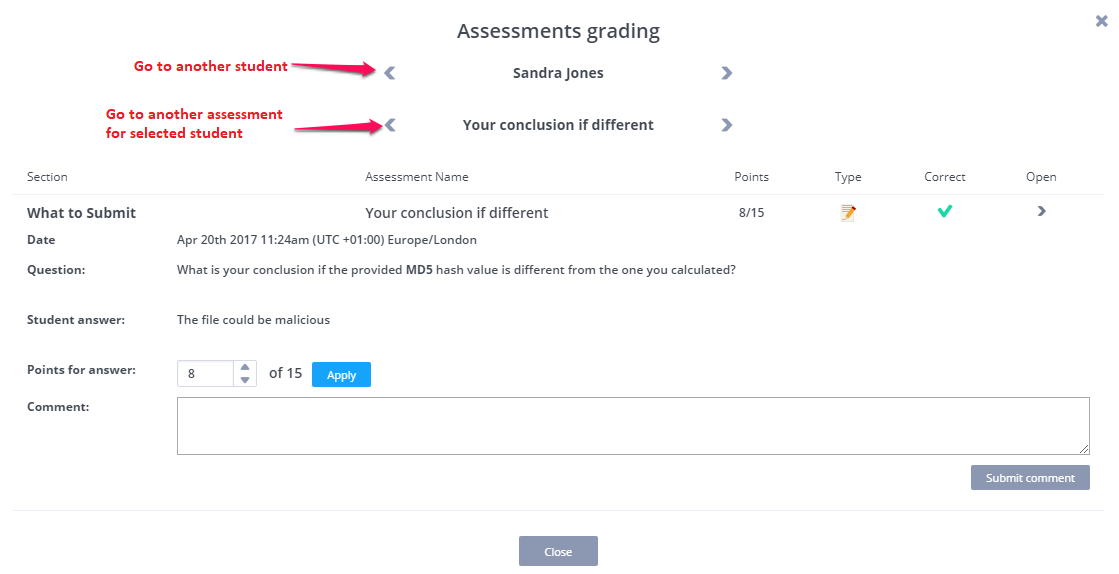
Navigate Student Assessments
You can navigate through student assessments using the left (<) and right (>) arrow buttons at the bottom of the Assessments grading dialog.
View Graded Free Text Assessments
You can view the points given and the Correct column checked for all free text assessments that have been graded.
Free Text Assessments That Are Automatically Graded as Correct
Free text assessments can be automatically graded as correct. To learn more, see Free Text Autograde.