Standard Code Test
Standard code tests are dialog driven, where you specify input data and the expected output. Codio then executes the student code, supplies the specified input data, and compares the expected output to the student code’s actual output.
Note
The output (including white space) of all the test cases in your Standard Code test cannot exceed 20,000 characters. If your output will exceed this limit, or you need finer control of the tests, you can create custom code tests. See Advanced Code Tests for more information.
For more information about adding a Standard Code Test, view this video
Assessment Auto-Generation
Assessments can be auto-generated using the text on the current guide page as context. For more information, see the AI assessment generation page.
The Standard Code Test assessment generation creates:
Instructions for the student
Test cases using standard input or command line arguments
Expected output specifications
A solution with explanation
A code file for the student with the solution bracketed within solution templates
Assessment Manual Creation
Follow these steps to set up a standard code test. For more information on General, Metadata (Optional) and Files (Optional) see Assessments.
Complete General.
Click Execution in the navigation pane and complete the following information:
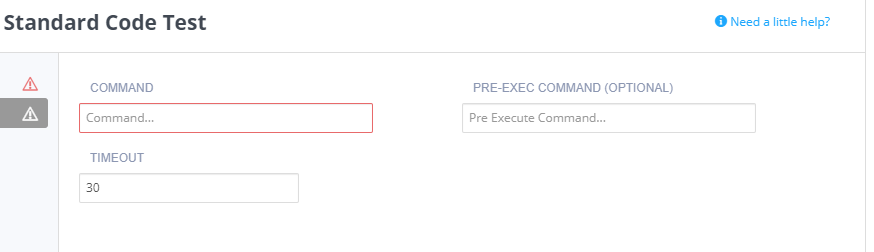
Command - Executes the student code (usually run).
Pre-exec command - Executes before each test runs (usually compile). If this fails, the main Command will not run.
Timeout - Amend the timeout setting for code execution (up to 300 seconds via arrows, or manually enter a longer period).
Language-Specific Commands
Select your programming language for command examples:
Compile:
javac -cp path/to/file filename.javaRun:
java -cp path/to/file filename
Run:
python path/to/file/filename.py
Compile:
gcc filename.c -o filename -lmRun:
./filename
Compile:
g++ -o filename filename.cppRun:
./filename
Run:
ruby filename.rb
Run:
bash full_path.sh
Run:
mysql EPDriver < /home/codio/workspace/codetest.sql --table
Codio provides helper scripts to run queries via ODBC (stricter spacing than sqlcmd).
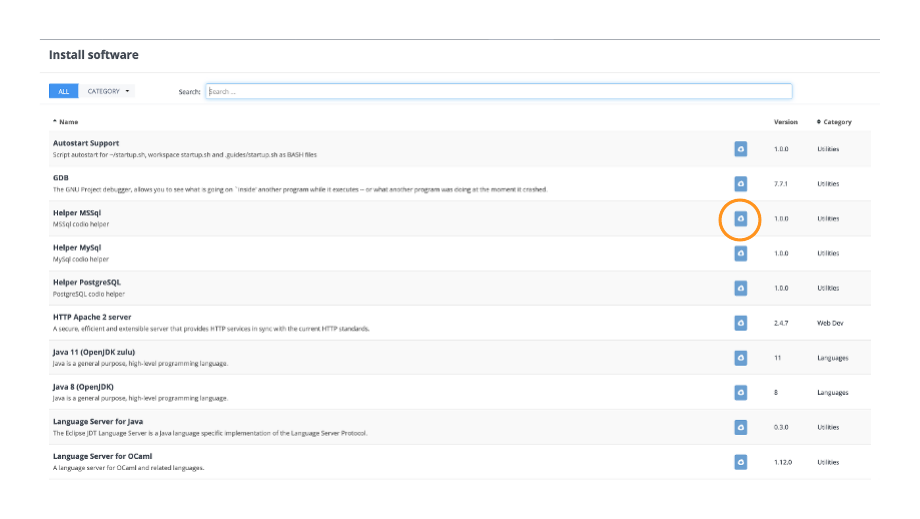
Note
First install the appropriate helper script via Tools > Install Software (MSSQL, MySQL, or PostgreSQL).
Run the appropriate command:
MSSQL:
python .guides/scripts/helper_mssql.py --db_host localhost --db_user SA --db_pass YourPassword --db_name DBNAMEMySQL:
python .guides/scripts/helper_mysql.py --db_host localhost --db_user root --db_pass YourPassword --db_name DBNAMEPostgreSQL:
python .guides/scripts/helper_postgres.py --db_host localhost --db_port 5432 --db_user postgres --db_pass YourPassword --db_name DBNAME
Click Grading in the left navigation pane and complete the following fields:
Setting |
Description |
|---|---|
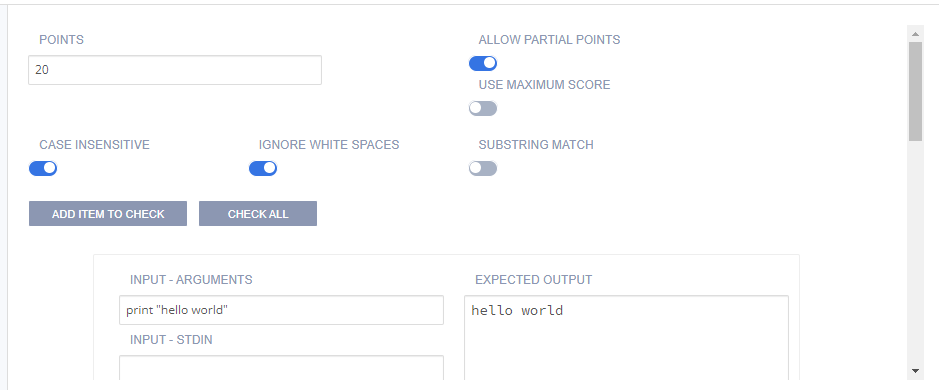
Points |
The score given to the student if the code test passes. You can enter any positive numeric value. If this assessment should not be graded, enter 0 points. |
Allow Partial Points |
Toggle to enable partial points, the grade is then based on the percentage of test cases the code passes. See Allow Partial Points for more information. |
Use Maximum Score |
Toggle to enable assessment final score to be the highest score attained of all runs. |
Case Insensitive |
Toggle to enable a case insensitive output comparison. By default, the comparison is case sensitive. |
Ignore White Space |
Toggle to enable stripping out any white space characters (carriage return, line feed, tabs, etc.) from both the expected output and the student output. |
Substring Match |
Toggle to enable substring match when comparing the expected output to the student output. The entire expected output needs to be contiguous in the student output. |
Search |
Search the test cases by the number/index assigned to it. |
Expand All/Collapse All |
Click to expand/collapse all test cases. |
Add Item to Check |
Click to create another set of input/output fields. |
Delete |
Click to delete the test case. |
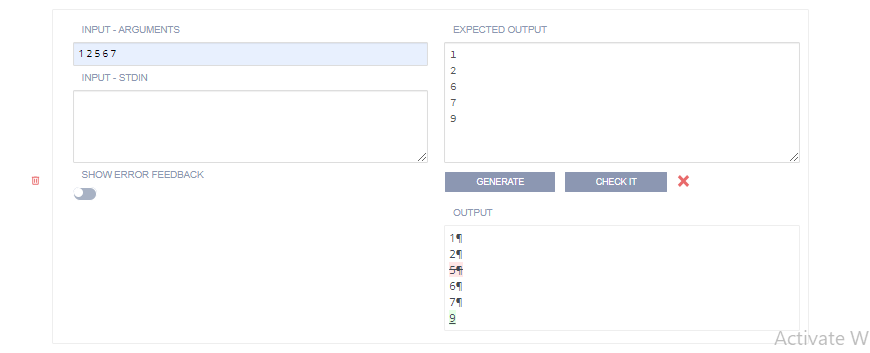
Check All |
Press to check all test cases at once so you can see how many of them are passed or failed. |
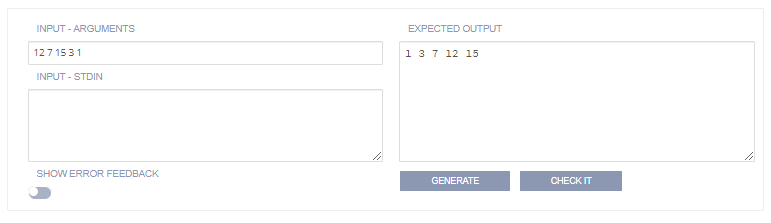
Input - Arguments and Input - Stdin
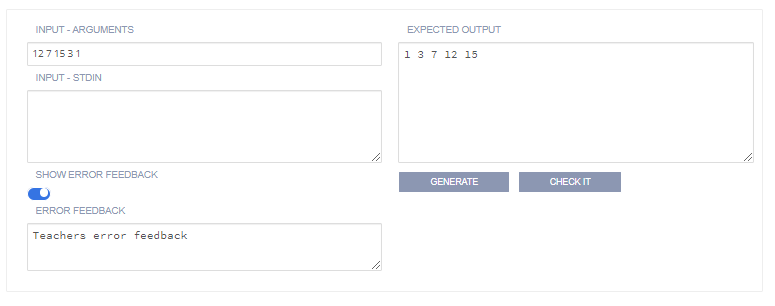
Enter the command line arguments that are read by the student code.
Enter data that would be entered manually in the console. For example, Enter your Name:. If using this input method:
The input data should have a new line if it would be expected in the actual program execution.
In the Output field, the prompt text that is displayed to the user appears in
stdoutand should be reflected in your output field but without the data entered by the user. You do not need a new line in the output field between each input prompt as the new line character is part of the user input.Ignore white space and Substring match are recommended options as they make the test more tolerant. The following image shows how to format input and output fields if you are not ignoring white space or doing a Substring match. Note how the input field only supplied the values to be input, not the prompt itself (which is actually a part of
stdout). It is important to accurately account for all spaces and carriage returns.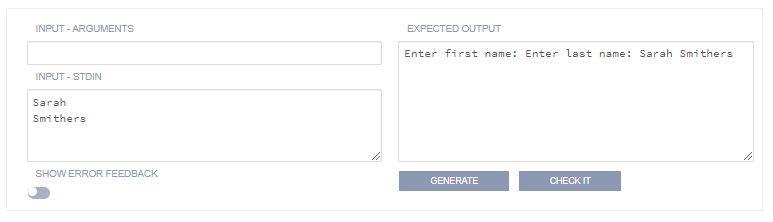
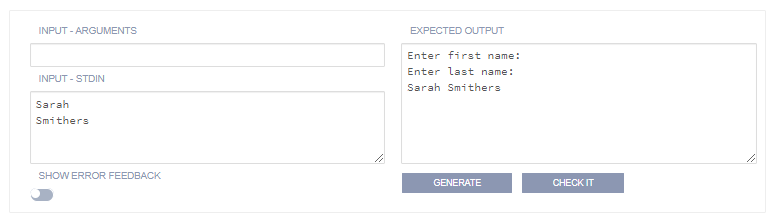
The following image shows the more tolerant approach with the Ignore whitespace option set. In this case everything on its own line for readability. The whitespace characters will be stripped out of both the expected output and the student output at runtime.
Click Create to complete the process.
Output Written to a File
If the output of a program is written to a file rather than Standard Output (stdout) you can use the Command portion of the execution tab to run a bash command to list out the contents of the file.
For example if the output is written to a file called output.txt, you would put the following into the Command.
cat output.txt
In Linux, the command cat lists out the contents of the file. You can use the Pre-exec command to run the student code in this case.