Blackboard LTI 1.x
The following page explains how to set up external apps in Blackboard Learn.
In Codio:
Enable LTI for Your Course
Open the course you would like to connect or create a new course.
Make sure you have at least one published assignment or add a new one. (see Add and Remove Course Assignments)
Select the LTI/LMS tab.
Select the ENABLE LTI option.
Click Save Changes.
Bring up the LTI Integration Information
Click your username in the top-right corner of your dashboard.
Choose your Organization.
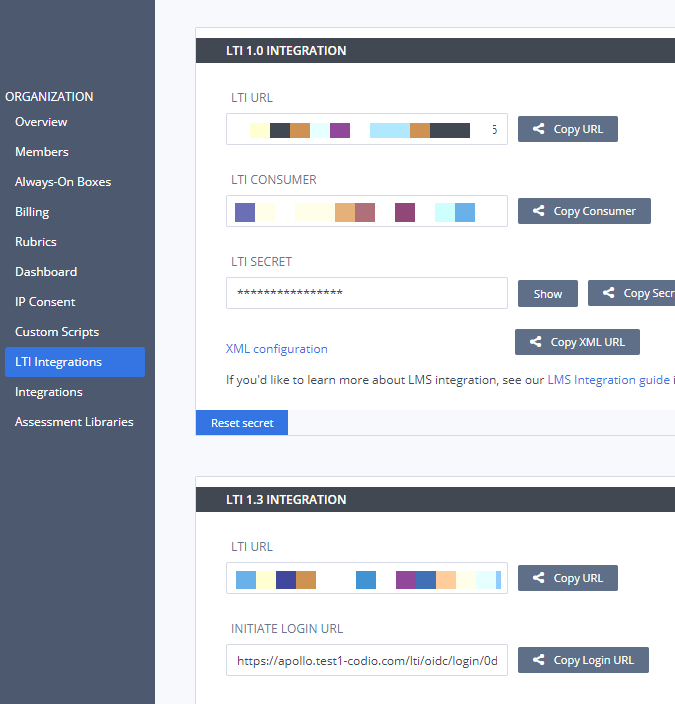
Click the LTI Integrations tab to bring up the following settings.
In Blackboard
The Blackboard user who carries out these steps must be a Blackboard system administrator.
Create a new Course in Blackboard. We suggest you create a test course called Codio Blackboard before you do it with a production course.
Look for the System Admin tab near the top right of the page and select it.
Look for the Building Blocks section and select it.
Click on LTI tool providers.
Click on Register Provider Domain in the menu bar.
In the Provider Domain field, enter
apollo.codio.com.In the Default Configuration section, set Default Configuration to be Set globally.
In the Organization Policies section you should
set Send User Data to Send user data only over SSL.
in User Fields to Send you should set all 3 fields (Constituency in Course, Name, Email Address).
In Codio and Blackboard
Now return to the Default Configuration section in Blackboard. We will now copy the following global integration fields from Codio to Blackboard.
LTI Consumer -> Tool Provider Key
LTI Secret -> Tool Provider Secret
Codio course setup
You need to perform the following actions one time only for a course. The Blackboard user who carries out these steps does not need to be a system administrator but must have suitable privileges to edit courses and assignments.
In Codio, go to your course and click on the LTI/LMS tab.
Go to the LTI/LMS Settings area.
At the top is a switch Enable LTI which you should check is enabled.
Below this is an empty field Course LMS URL. Switch back to Blackboard and make sure you are on the main the Codio Blackboard course you created earlier. Copy the url in the address bar of your browser to the clipboard and paste it into the above mentioned field in Codio.
This URL ensures that Codio knows how to redirect students back to the correct Blackboard course should they attempt to access the course through their dashboard.
Mapping an assignment to Blackboard Content
The final mapping step needs to be taken for each individual assignment within Codio. It maps a piece of Blackboard content to a Codio assignment.
In Codio
On the main course screen, make sure the Edit Assignments tab is selected.
Click the Add Assignment button and select Project Based.
Select a project that has some autograded assessments. The My First Project that you created earlier in the Onboarding Guide has some auto-graded assessments. You can also assign another project but you will need to manually grade the assignment so there are some scores to pass back to the Blackboard gradebook.
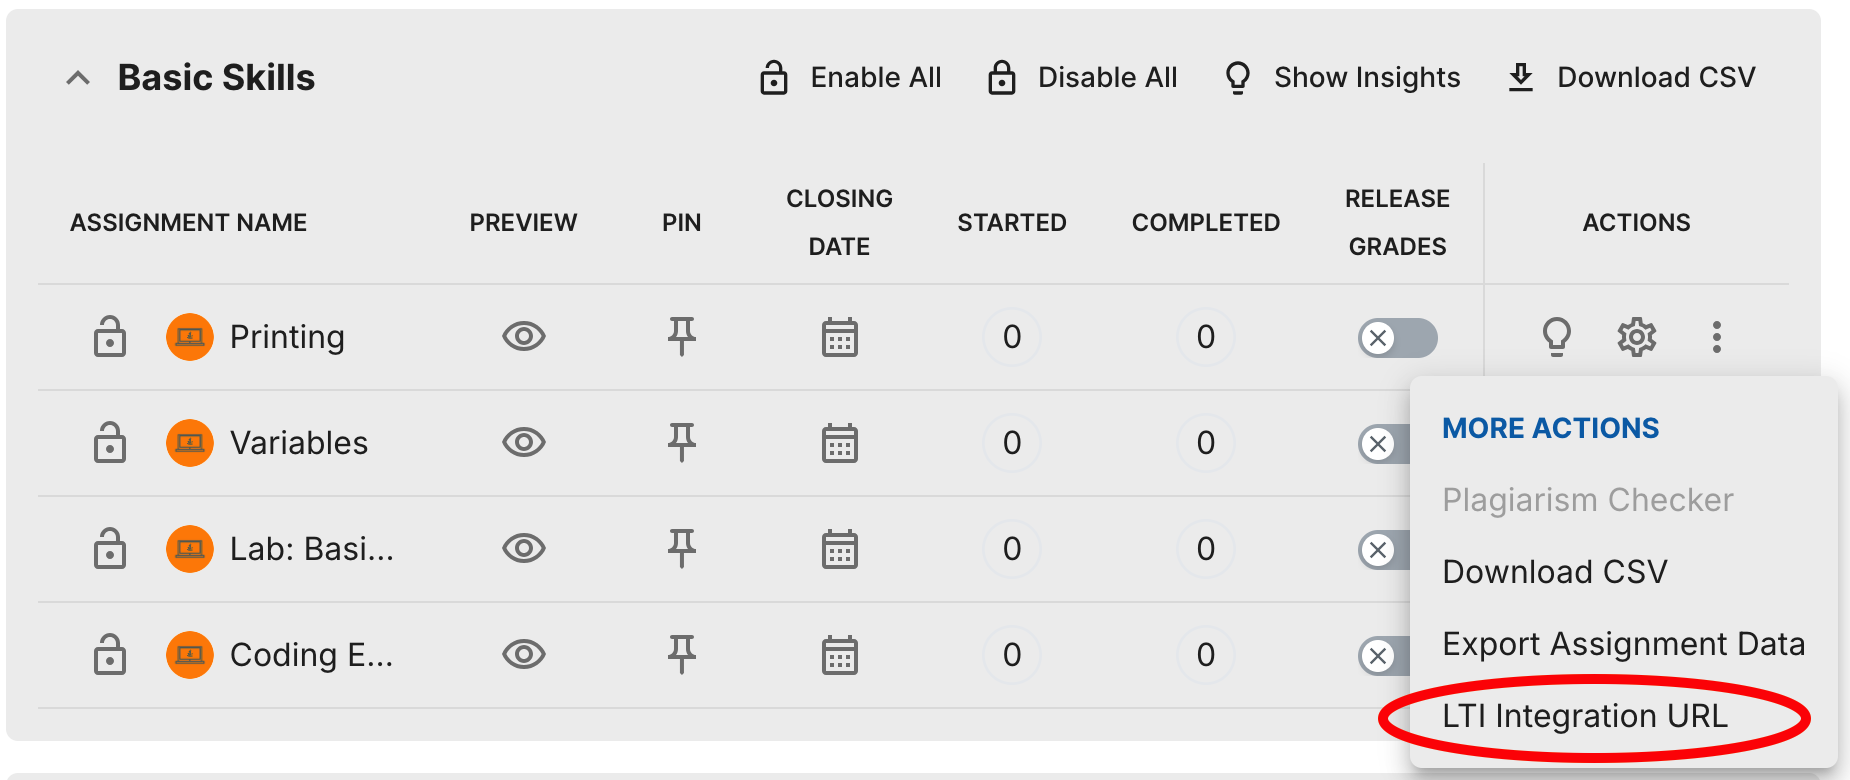
Once the assignment has been added to the course, you should click the three dots to the right of that assignment and select LTI Integration URL.
You should copy the LTI integration url to the clipboard by clicking on the field (it will auto copy).

In Blackboard
We now return to Blackboard complete the mapping.
Make sure you have selected the Blackboard course.
Click Content in the left hand menu.
Select or hover over Build Content in the menu bar
Select Web Link.
In the Web Link Information section …
Enter a name for the content
Paste in the LTI Integration URL that you just copied to the clipboard from Codio
Check the box This is a link to a tool provider
Select Yes for the field Enable Evaluation after which more fields will appear
Set the points you want to award for this content (Codio will automatically scale the percentage value it uses to the points you specify here)
Save the content settings.
Authentication and account creation
To add students/teachers, see User account creation.

