LTI 1.3 for Brightspace/D2L
In Brightspace - Register a Tool
The following is created in Manage Extensibility, LTI Advantage - Register a Tool, select Standard.
1. Name - Codio
2. In the Domain field enter - https://apollo.codio.com
Access LTI Integration settings in Codio
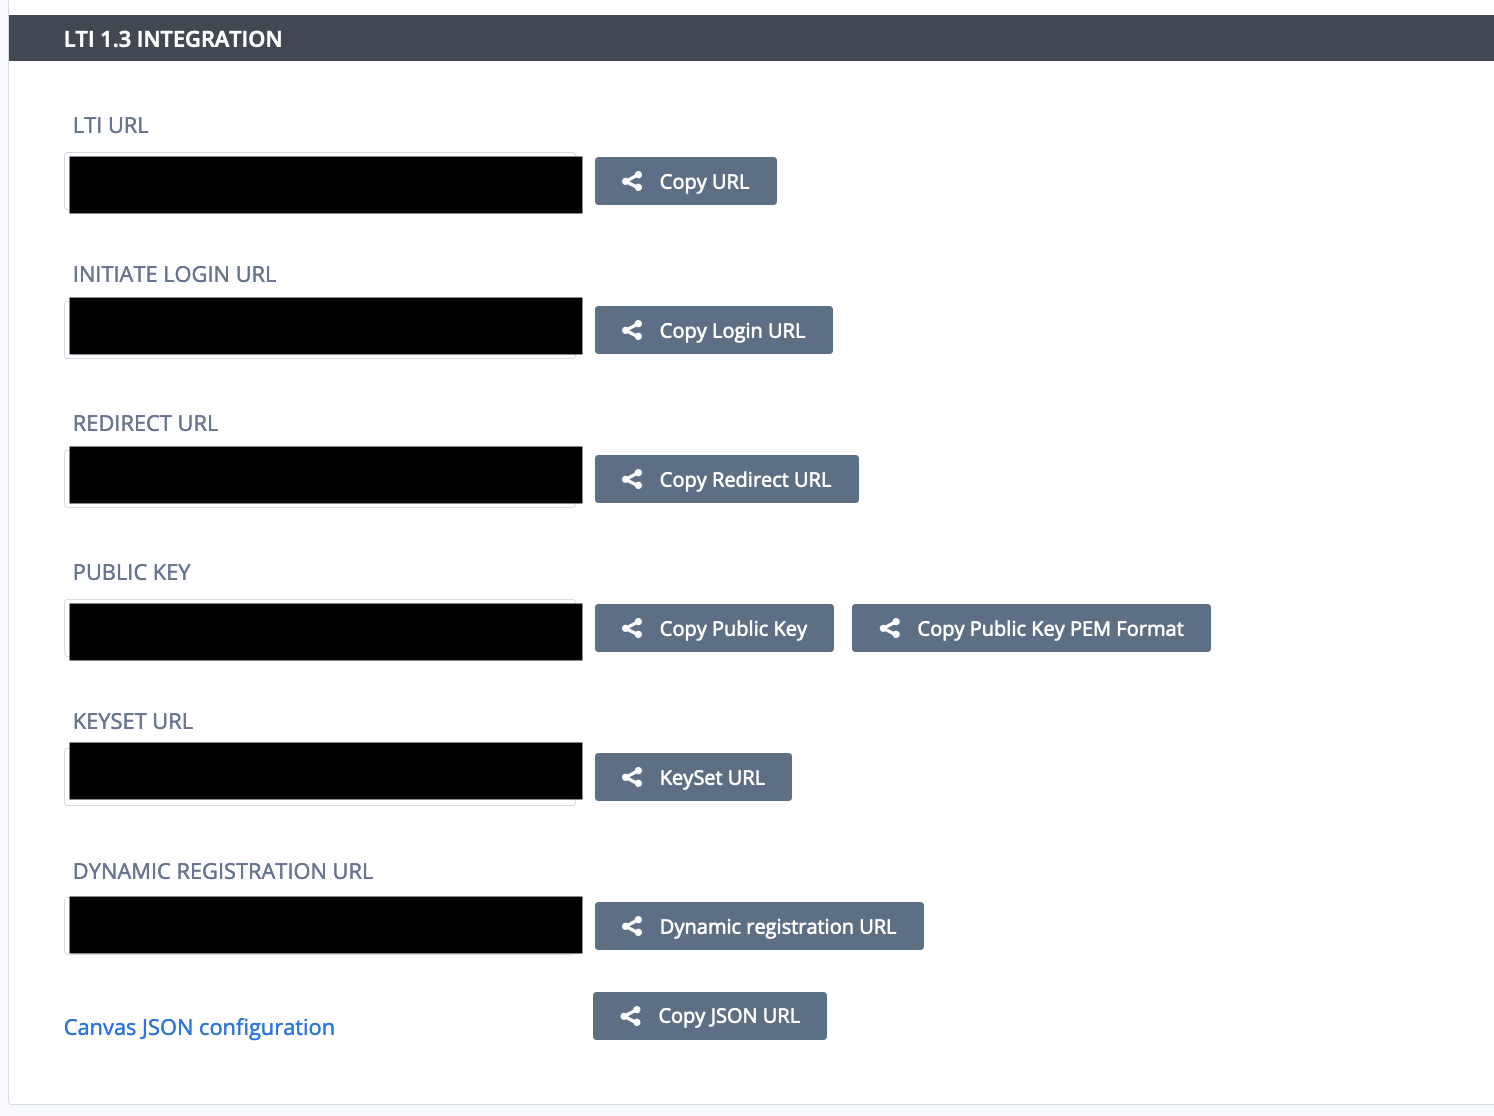
Click your username in the top-right corner, then select Organizations from the menu.
In the Organizations area, click the name of your organization.
Select the LTI Integrations tab.
Scroll down to the LTI Integration 1.3 section. You should see the following fields. Remain on this screen for the time being.
Copy fields from Codio to Brightspace/D2L
Important
When copying links, please use the copy button adjacent to each link to ensure accuracy and prevent linking errors.
Copy Initiate Login URL to the OpenID Connect Login URL field.
Copy Redirect URL to the Redirect URL field.
Copy Keyset URL to the Keyset URL field.
In the Extensions section enable Assignment and Grader Services, Deep Linking and Names and Role Provisioning Services.
Press Register - leave the pop-up on the screen, you will be copying values from it.
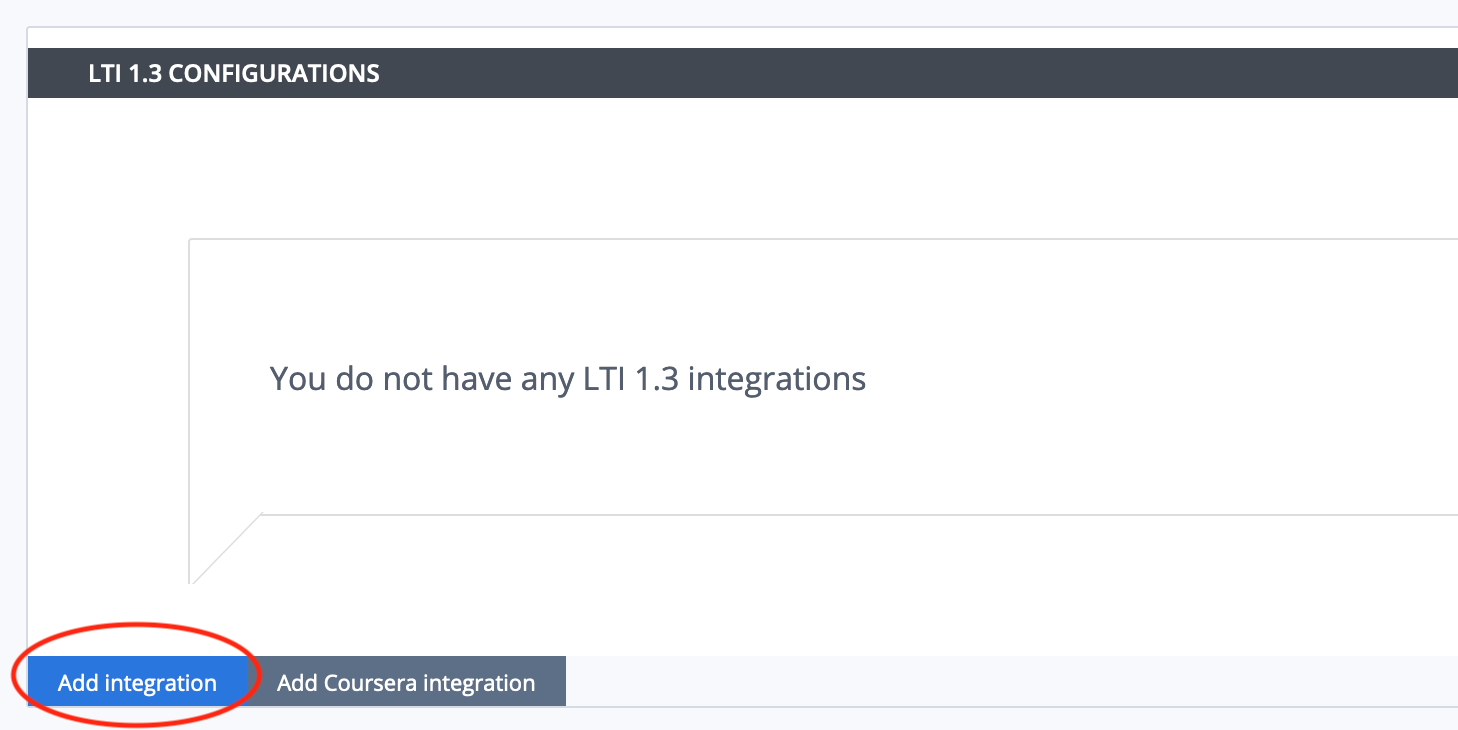
Add the Integration you created
In Codio on the LTI Integrations screen scroll down to the LTI 1.3 Configurations field and click Add Integration
From the pop-up in Brightspace/D2L copy the Issuer ID and place in the PLATFORM ID field
Copy fields from Brightspace/D2L pop-up to Codio
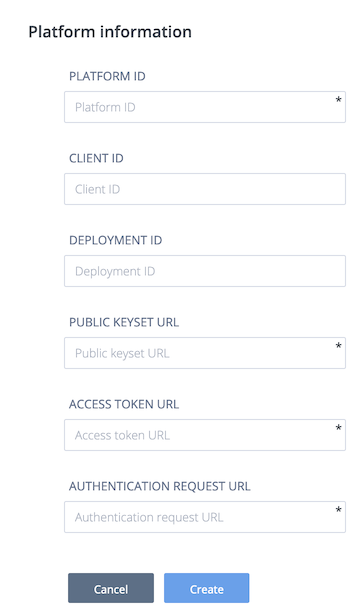
Copy the Client ID to the Client ID field in Codio.
Copy the Keyset URL to Public Keyset URL field.
Copy the Brightspace OAuth2 Access Token URL to the Access Token URL field in Codio
Copy the OpenID Connect Authentication Endpoint to the Authentication Request URL field in Codio
Click on View Deployments and create a New Deployment
In the Tool field select the tool you just created
Name it Codio Deployment or something similar.
In the Security Settings section you need to send at least the Name and the Email if you aren’t choosing to enroll your students anonymously.
Toggle Open as External Resource if you want to open the tool in a new tab, otherwise it will open as an iFrame.
Toggle Grades created by LTI will be included in Final Grade if you are using grades passed from Codio.
Add Org Units as you need for your setup.
Click Create Deployment.
Copy the deployment ID that is generated and paste it into Codio into the Deployment ID field.
Click Create in Codio.
Create the new link in Brightspace/D2L
In your Brightspace/D2L environment you can dismiss the pop up.
In the deployment tool click View Links and then create a New Link
Name it Codio.
In the URL field paste:
https://apollo.codio.com/lti/resource_selectionChange type to Deep Linking Quicklink
Click Save and Close
Connect Brightspace/D2L and Codio assignments
The final mapping step needs to be taken for each individual assignment within Codio. It maps a Brightspace/D2L assignment to a Codio assignment.
In Brightspace/D2L
Select the Content tab from the top of the page.
Add a new module in your D2L course.
Select Add Existing Activities
From the list of available LTI links, select the Codio tool you created earlier.
Click on the Codio link to bring up all the Codio courses for which you have enabled LTI.
Select the Codio assignment you want to connect.
LTI Course copy for Brightspace/D2L
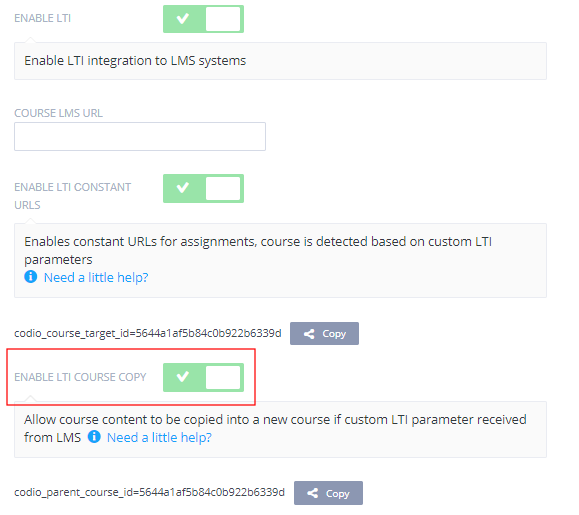
Enabling this setting allows existing Codio course content used in your LMS to be copied into a new Codio course and a new course in your LMS. This should be enabled for the courses connected with the “Master” course in your LMS. The parameter will be disabled by default for all copied courses.
First enable LTI Constant URLs for your course.
In your existing Codio course, enable the Enable LTI course copy button, and save your changes