Virtual Coach
When Virtual Coach is enabled, students can use AI to assist them with their programming tasks. Codio’s prompts to the AI ensure that only assistance is provided, not solutions.
The Virtual Coach can help students understand error messages, gain a better understanding of the assignment prompt, or receive a hint about the next possible steps.
Codio conducts extensive research in the field of AI use in computing education. Error messages, summaries, and hints represent well-researched use cases for AI-assisted learning. Our Virtual Coach feature, which generates AI-powered explanations, demonstrates positive benefits for learners through improved completion rates and higher median grade attainment.
For more information, you can download our research paper.
Note
Virtual Coach is powered by Anthropic’s Claude model. No student’s personally identifiable information (PII) is stored by Anthropic, ensuring student privacy protection.
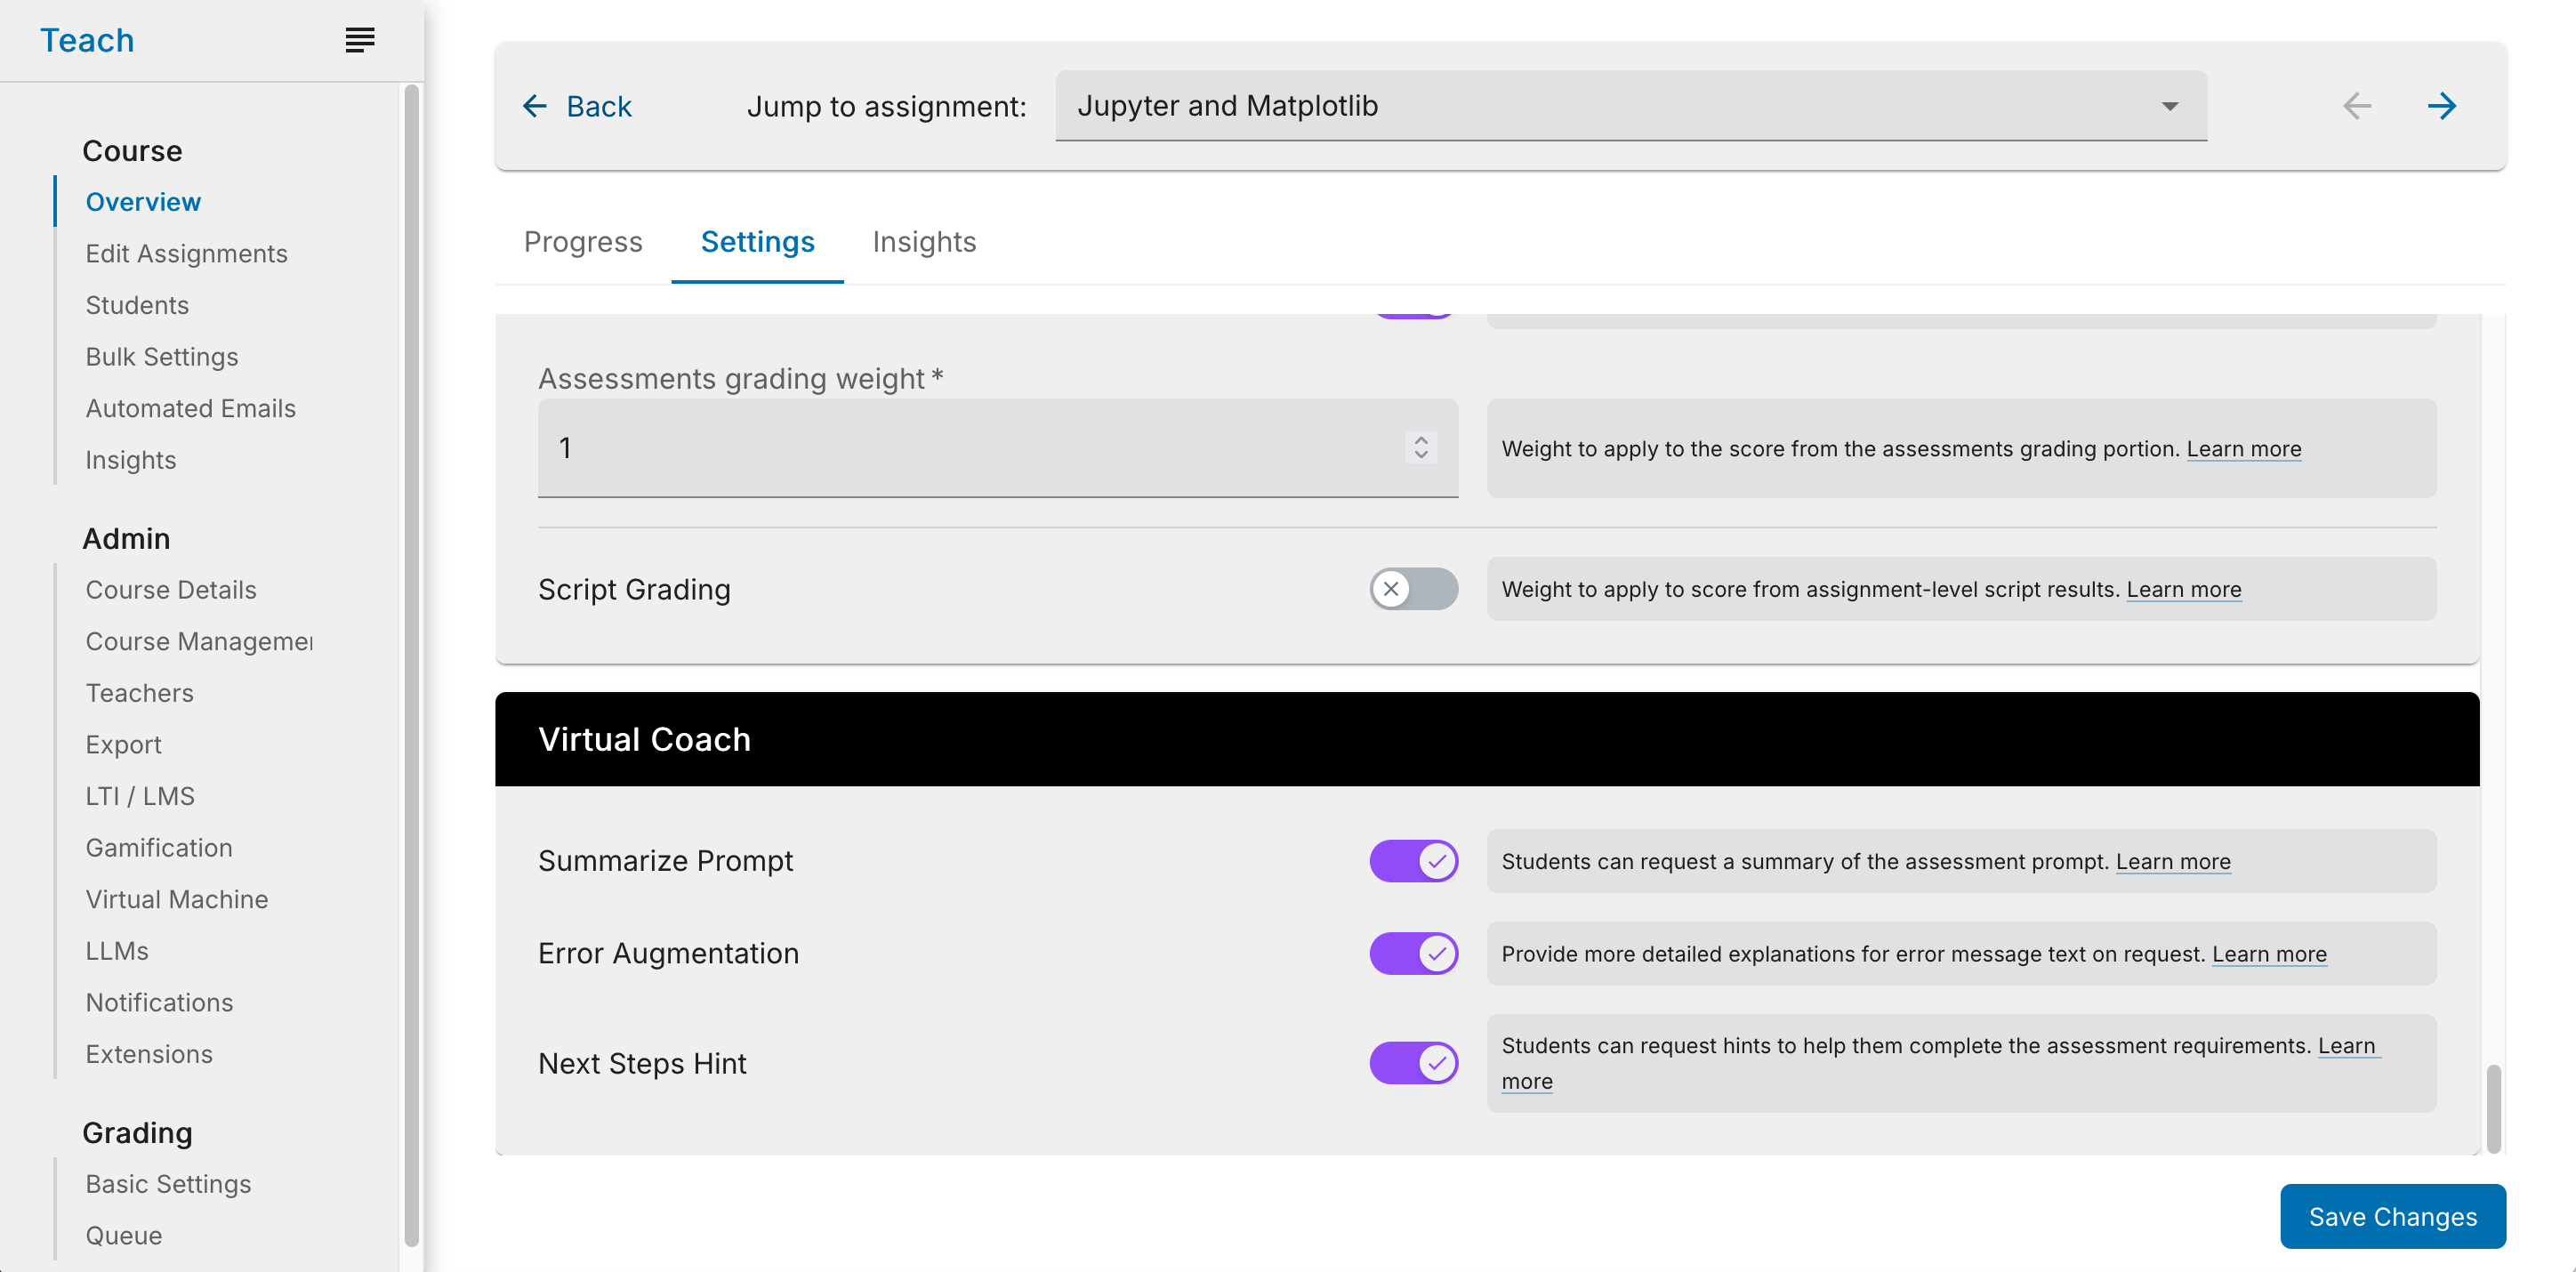
In the assignment settings, there are three settings you can toggle to enable the following features: Summarize Prompt, Error Augmentation, and Next Steps Hint.
Summarize Prompt: This option summarizes the text in the guide on the page and provides students with an enumerated set of steps.
Error Augmentation: Provides detailed explanations of error messages.
Next Steps Hint: Provides students with ideas for the next steps they can take to complete their assignment.
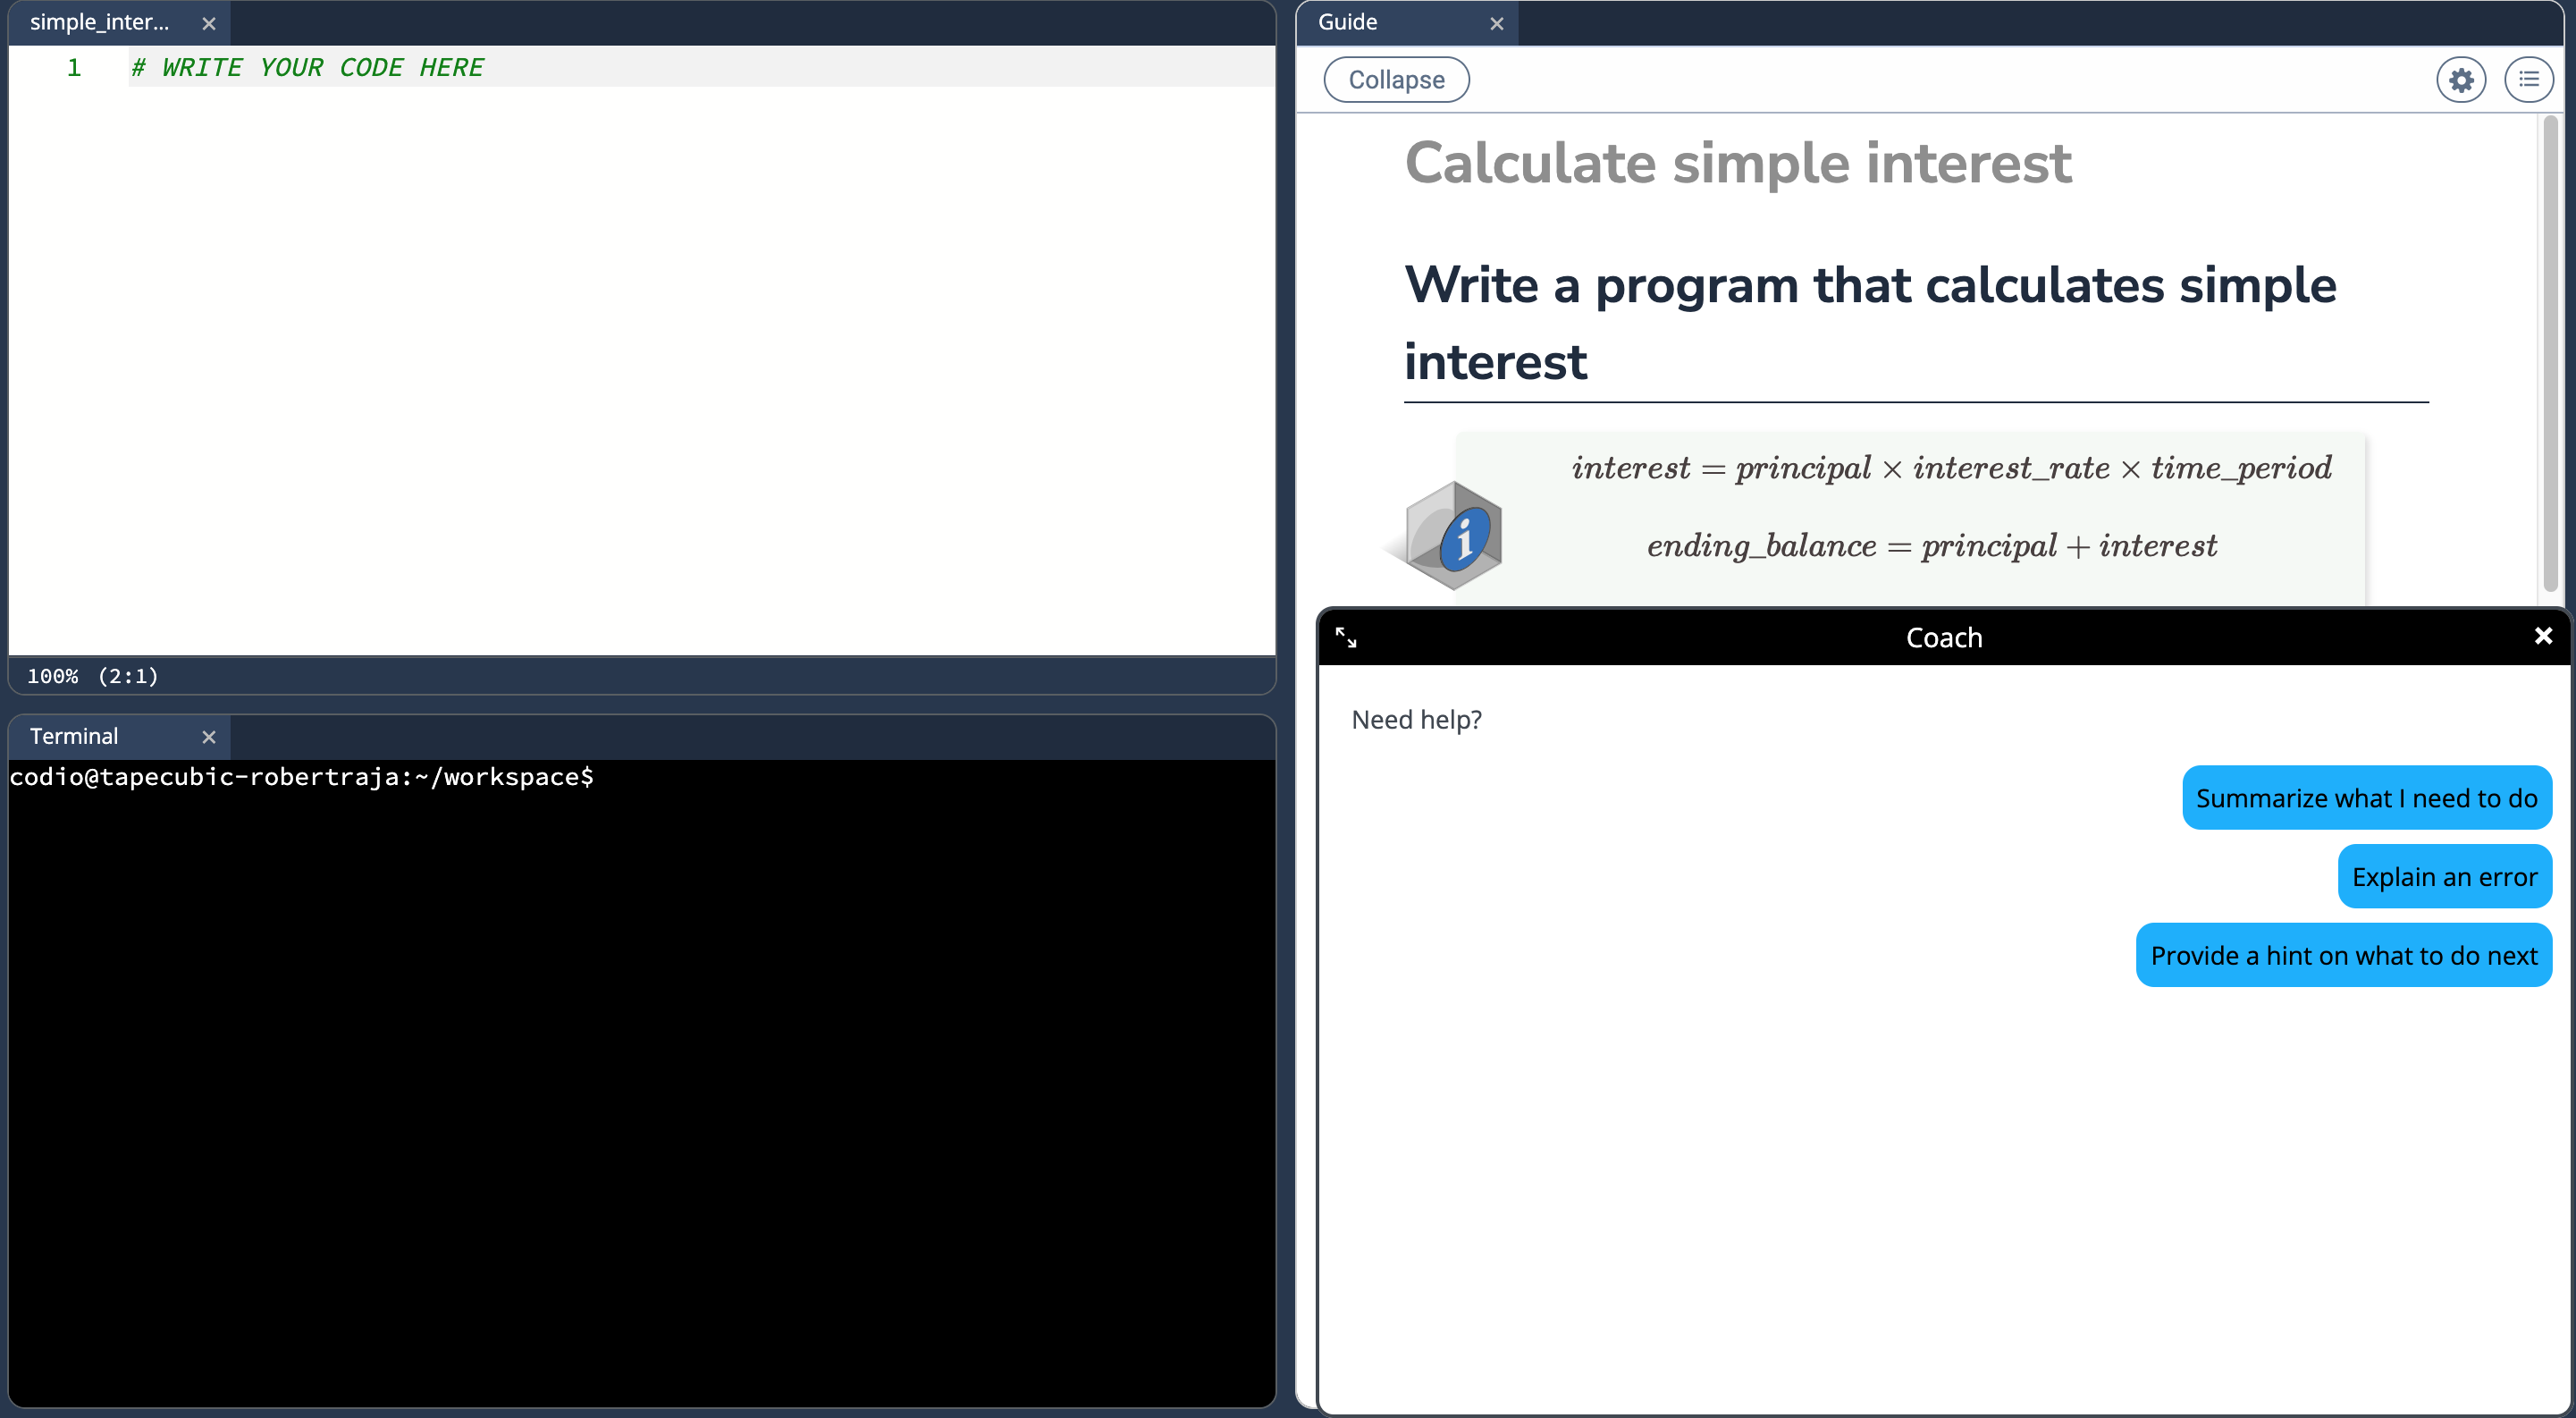
When a student clicks on the Virtual Coach icon in the bottom right corner, a dialog opens, and they can see the assistants you have enabled. If there is no Guide in the assignment, only error message augmentation will be available.
Students may select one of the options presented by the Coach to receive more information.
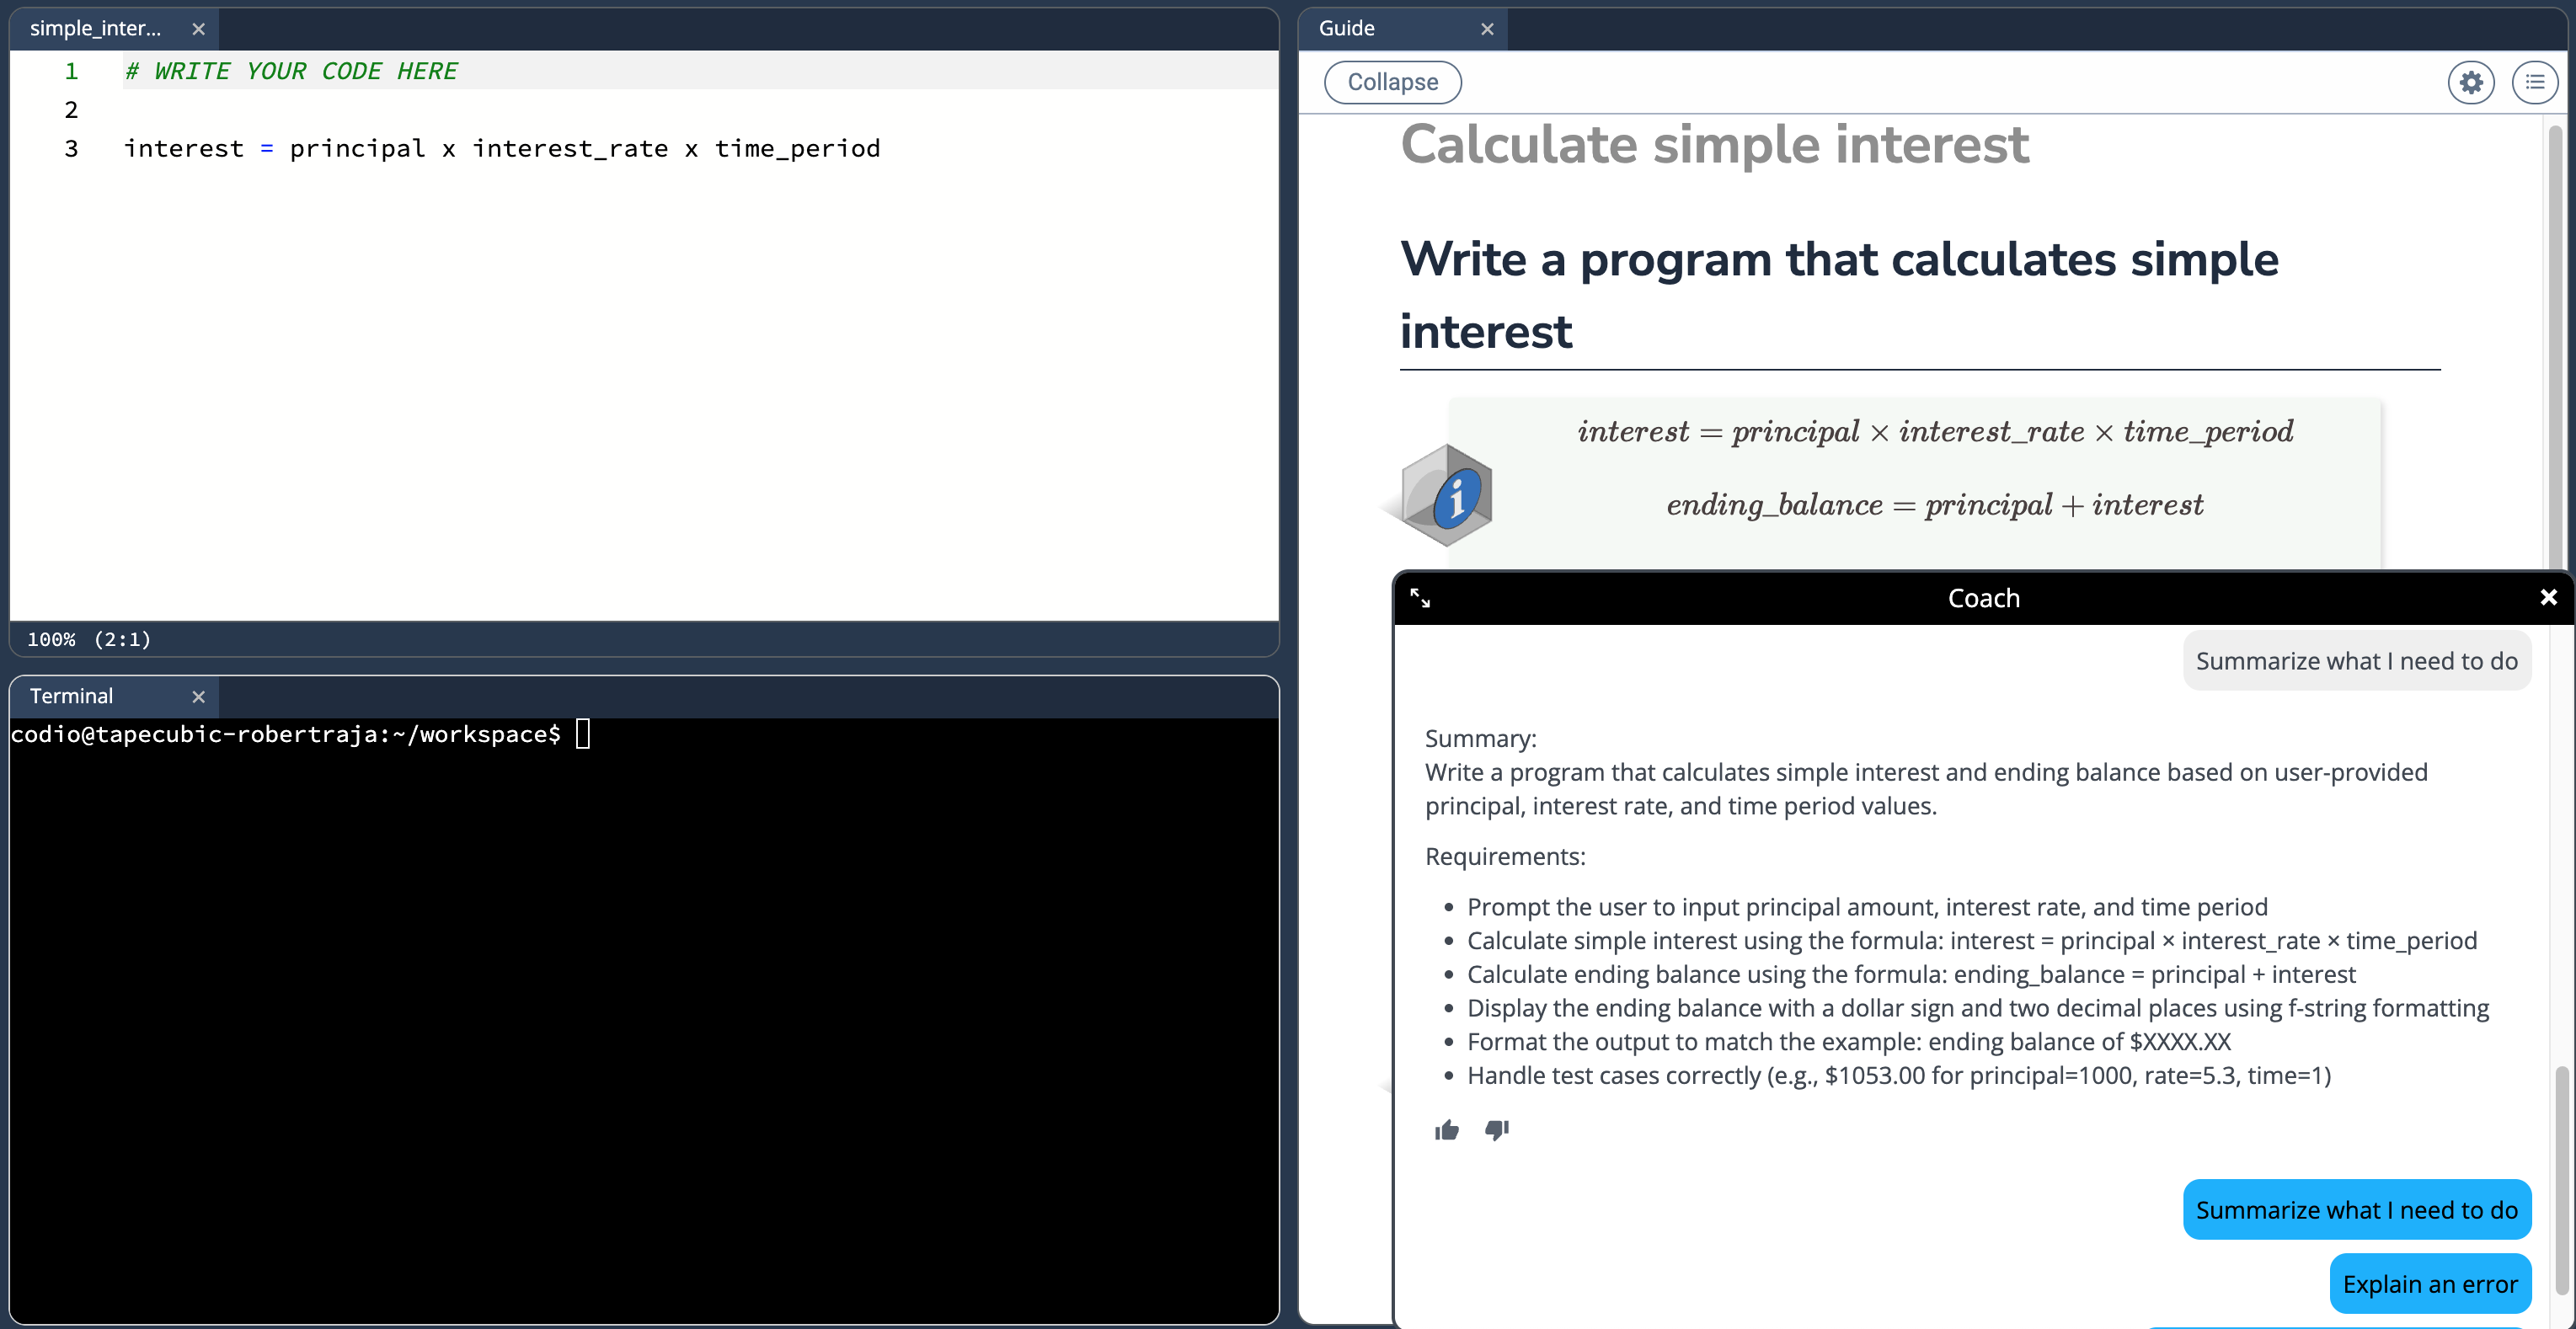
What they will see if they select Summarize Prompt:
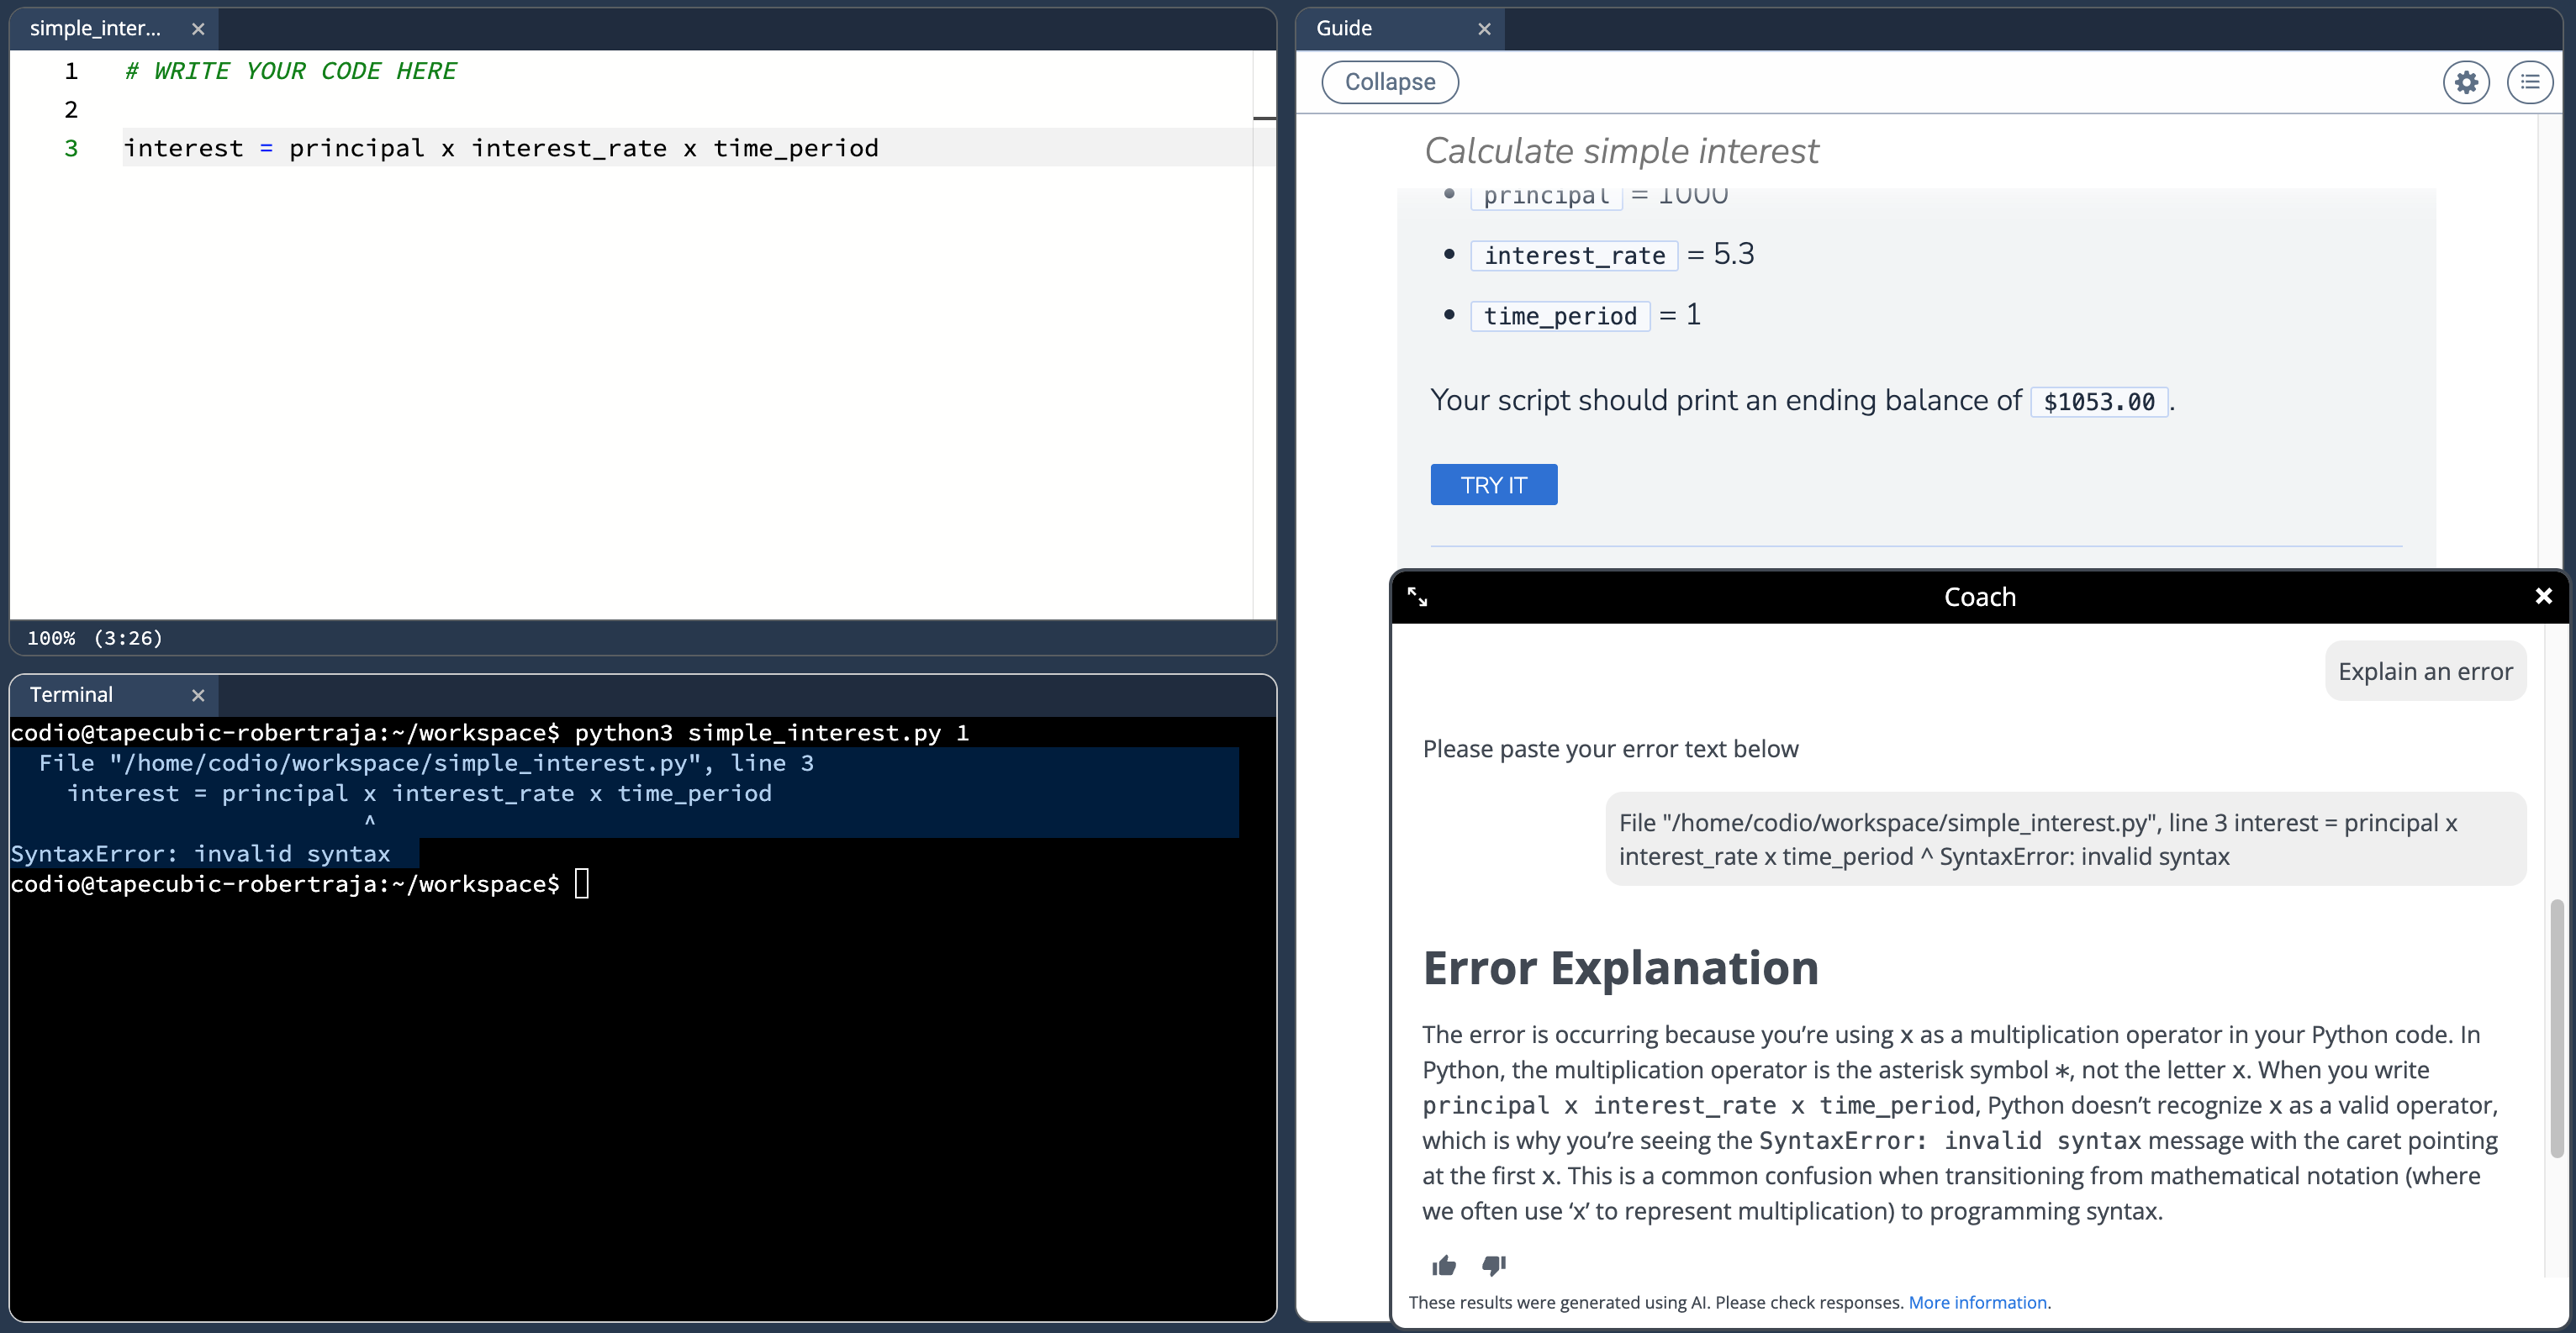
If error text is output to the terminal, students will need to paste the text of the error message in the prompt field in Virtual Coach.
If an error message is not provided, the student will receive the following: “The provided text does not look like an error message. Please paste an error message below.” If the student still does not provide an error message, they will be returned to the first screen with three buttons.
Note
Standard and Advanced Code tests have an additional “Explain this error” button that will appear if Error Augmentation is on and running a code test results in an error state.
Students can provide feedback on the Virtual Coach’s responses by using the thumbs up or thumbs down icon. The Virtual Coach window may be resized by dragging the resize handle in the upper left corner.
There are two ways to review how the Virtual Coach interacts with students:
Export Virtual Coach logs using the Codio API
codio.course.exportCoachData(courseId). For more information on Codio APIs, see Codio JS APIExport the Course Coach Log Data from the Export tab for the course. For more information, see Course Coach Log Data
Using Bulk Settings to Enable or Disable Assistants
You can enable or disable assistants for all assignments in a course using a CSV file, see Bulk Assignment Update
The CSV template for bulk assignment settings upload includes columns for each Virtual Coach assistant and any custom extensions you have.
The column values in the CSV file can be set to TRUE to enable assistants for any assignments in the course, and FALSE to disable them.
Using Course Settings to Enable or Disable Assistants
You can enable or disable assistants at the course level. Course-level settings override assignment-level settings. If you activate an extension at the course level, you cannot disable it for individual assignments.
Note
For more information about creating custom Virtual Coach assistants see Custom Assistants for Virtual Coach.