Schoology
Enable LTI for Your Course
In Codio
The Schoology system administrator should install a Codio external tool for the course so that it is quick and easy for instructors to add material. The Schoology system administrator should follow these directions to install Codio as an external tool:
Open the course you would like to connect or create a new course.
Make sure you have at least one published assignment or add a new one. (see Add and Remove Course Assignments)
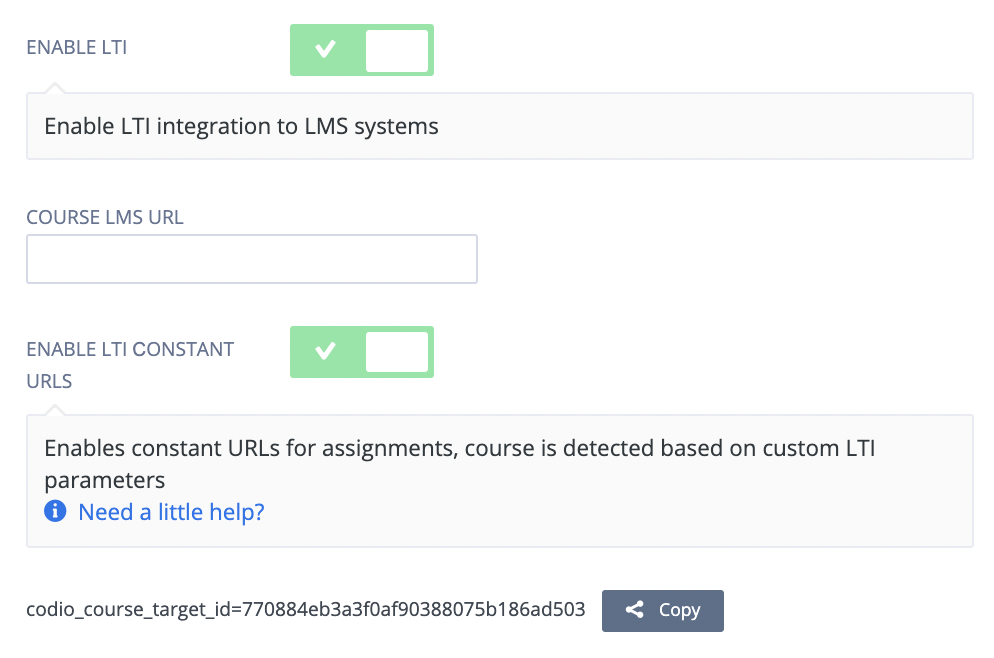
Select the LTI/LMS tab.
Toggle ENABLE LTI on.
Toggle ENABLE LTI CONSTANT URLS on.
Note the Codio Course Target ID, you will need that in subsequent steps.
Click Save.
Bring up the LTI Integration Information
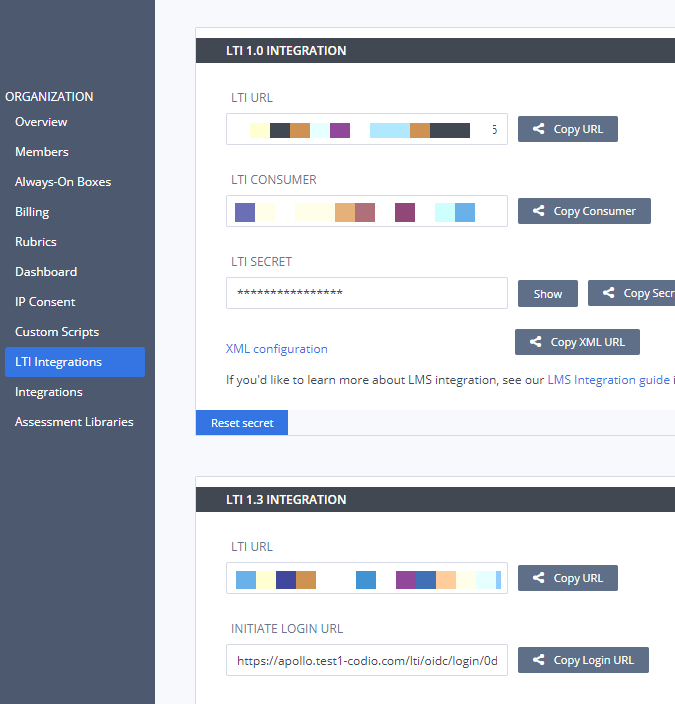
Click your username in the top-right corner, then select Organizations from the menu.
In the Organizations area, click the name of your organization.
Click the LTI Integrations tab to bring up the following settings. You will need to enter these into Schoology in the subsequent steps.
In Schoology
In your System Administrator account, click Tools in the header.
Select School Management.
Click Integration on the left.
Click External Tools.
Click Add External Tool Provider and fill out the form:
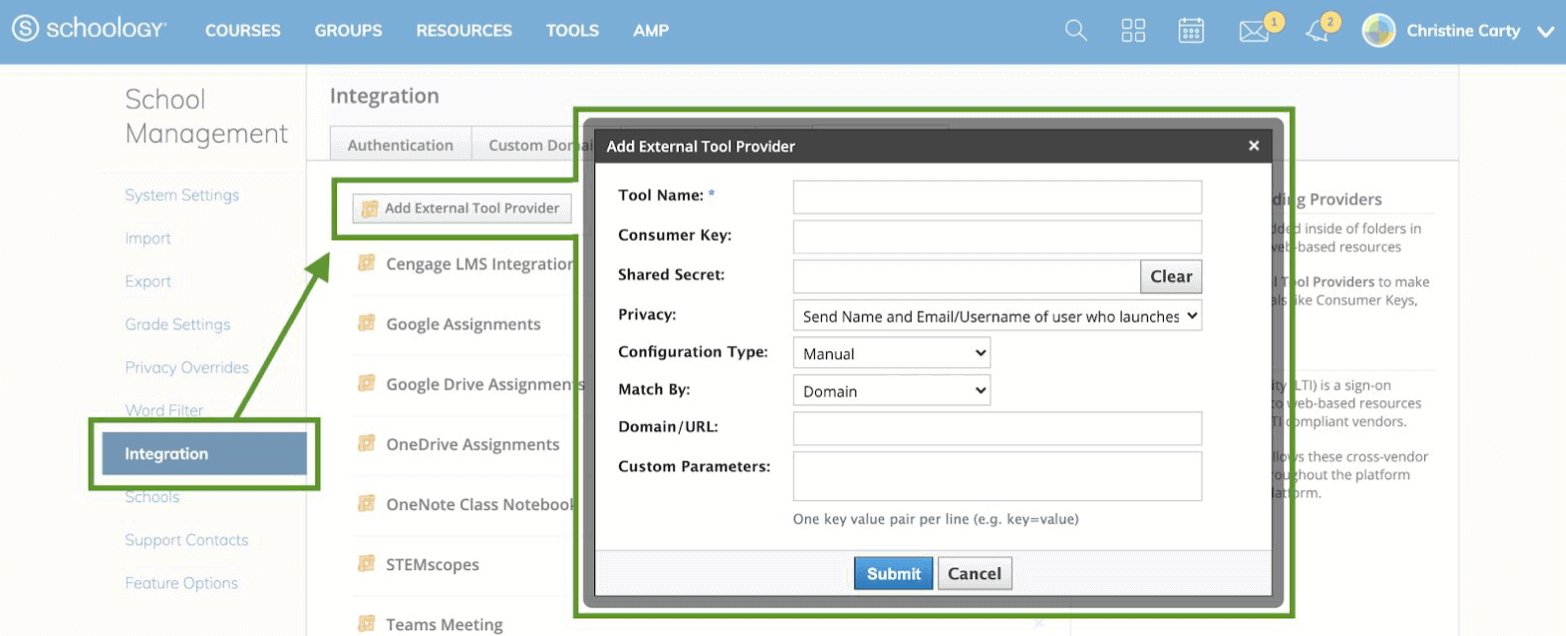
Tool name: this is the name educators see when adding external tools to their courses, so call this Codio
Consumer Key: this is the LTI consumer key from Codio (reference step 10 above)
Shared Secret: this is the LTI secret key from Codio (reference step 10 above)
Privacy: Schoology suggests Name and email of the user who launches the tool
Configuration Type: choose Manual > Matchy By > URL
Domain/URL: this is the XML URL from Codio (reference step 10 above)
Custom Parameters: this is the Codio Course Target ID from Codio (reference step 6 above)
Note
If you are teaching more than one course in Codio, your system administrator will need to enter each course’s Codio Course Target ID in the Custom Parameters field. Each Codio Course Target ID should be on a new line.
Click submit.
Mapping an Assignment to a Schoology Assignment
In Schoology
Once the system administrator has configured the external tool at the system level, return to your Materials page in Schoology. Then, to add the tool into your course:
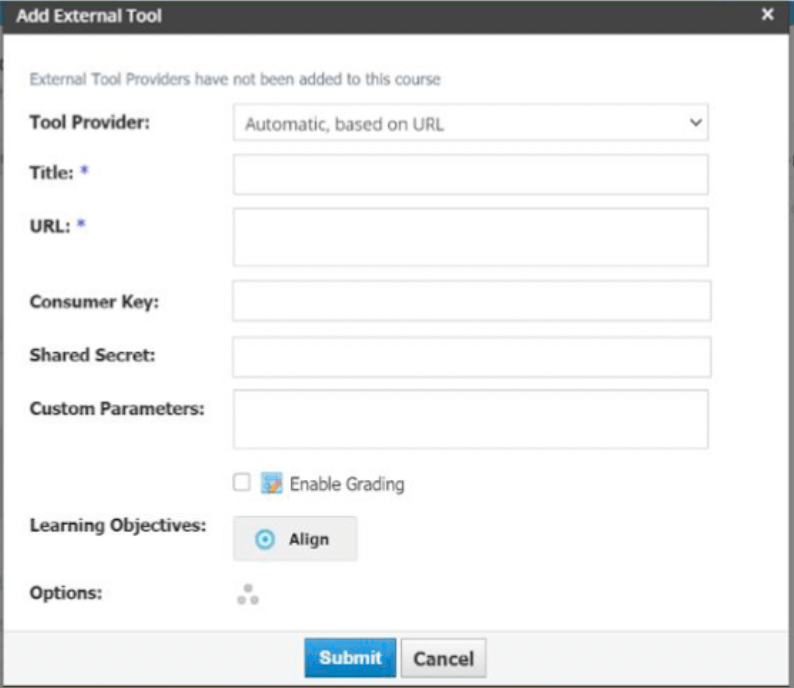
Click Add Materials.
Select Add File/Link/External Tool.
Select External Tool.
Enter the required information in the External Tool Form:
Tool Provider: select Codio if it has been configured beforehand
Title: name your assignment
URL: you will need to go back into Codio for this information (see steps 21-24 below)
In Codio
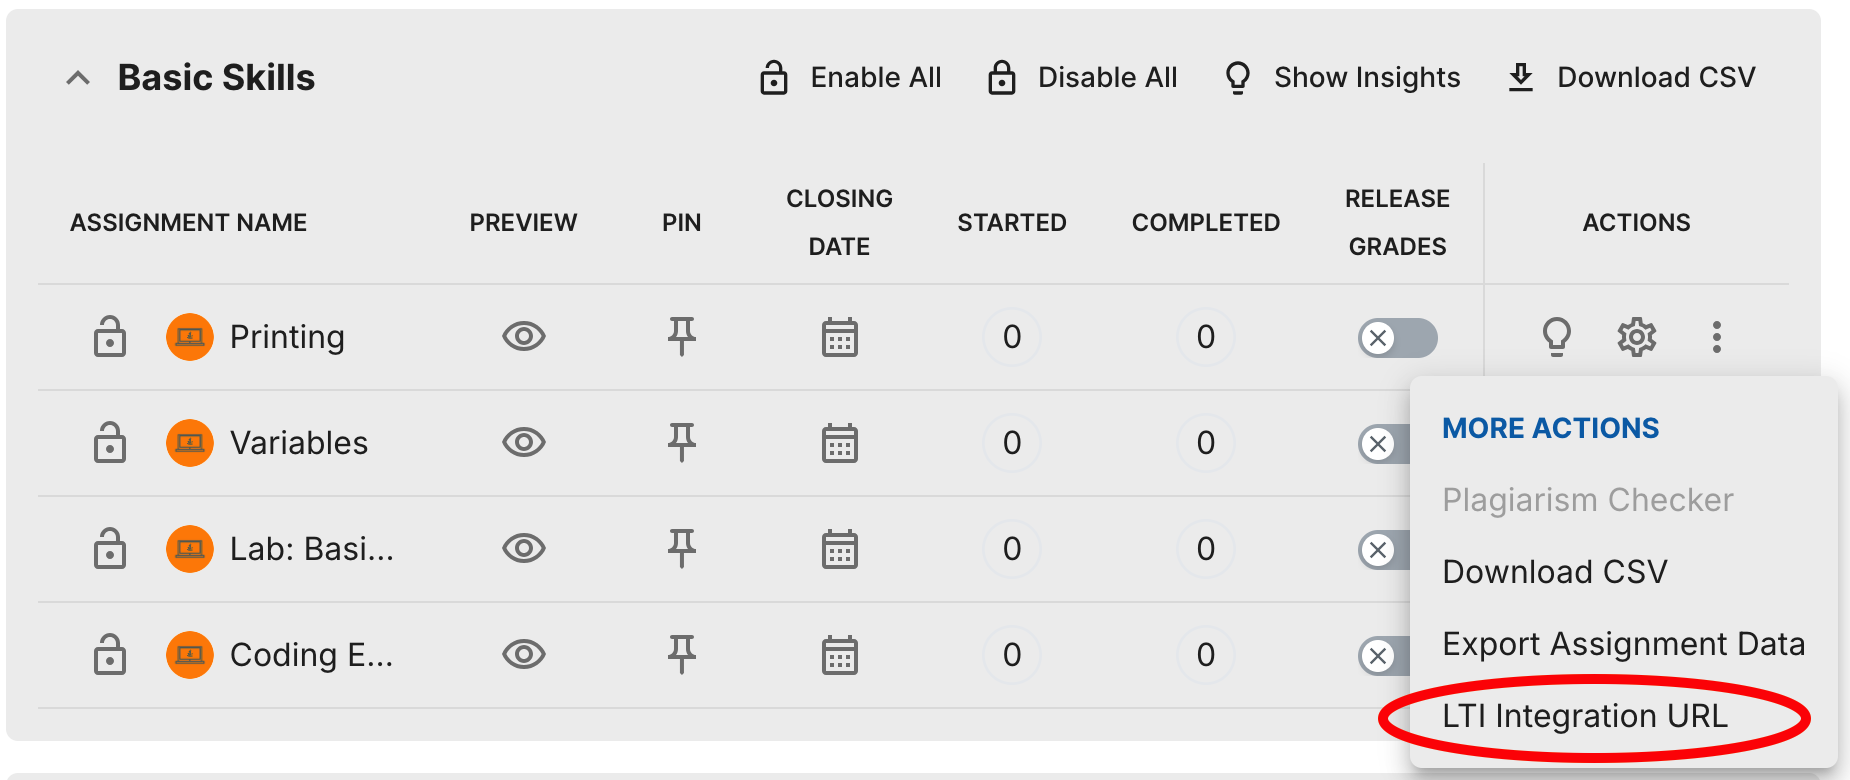
Navigate to the course you would like to integrate with Schoology and go to the Overview area.
Click the 3 vertical dots to the right of the assignment for each assignment you wish to map and select LTI Integration URL. Select the clipboard to copy the link.
Note
If you would like to access all the LTI integration URLs at once, navigate to the course, then the LTI/LMS in the Admin section. Select Assignment URLS and a CSV will download that provides the information for the course in one place.
In Schoology
Go back to Schoology and paste the LTI Integration URL into the URL field of the Add External Tool form from step 20.
You can enable grading on external tool items which adds the material to your Gradebook so that you can assign a grade for each student who completes the assignment launched via the external tool.
Note
LTI and external tool materials that have grading enabled in Schoology do not trigger submission notifications, grading reminders, or overdue notifications because Schoology does not automatically detect submissions from external tools.