LTI 1.3 for Canvas
On this page, you will find detailed step-by-step guidelines to help you integrate your Canvas and Codio accounts and connect assignments between the two applications.
LTI version 1.3 improves upon version 1.1 by moving away from the use of OAuth 1.0a-style signing for authentication and towards a new security model, using OpenID Connect, signed JWTs, and OAuth2.0 workflows for authentication. For more information, see Learning Tools Interoperability Core Specification
Part 1: In Canvas - Create a Developer Key
The Canvas user who carries out these steps must be a system administrator.
Important
When copying links, please use the copy button adjacent to each link to ensure accuracy and prevent linking errors.
In Codio:
Click your username in the top-right corner, then select Organization from the menu. In the Organizations area, click the name of your organization.
Select the LTI Integrations tab.
Scroll down to the LTI Integration 1.3 section; you should see the following fields. Keep this page open.
In Canvas:
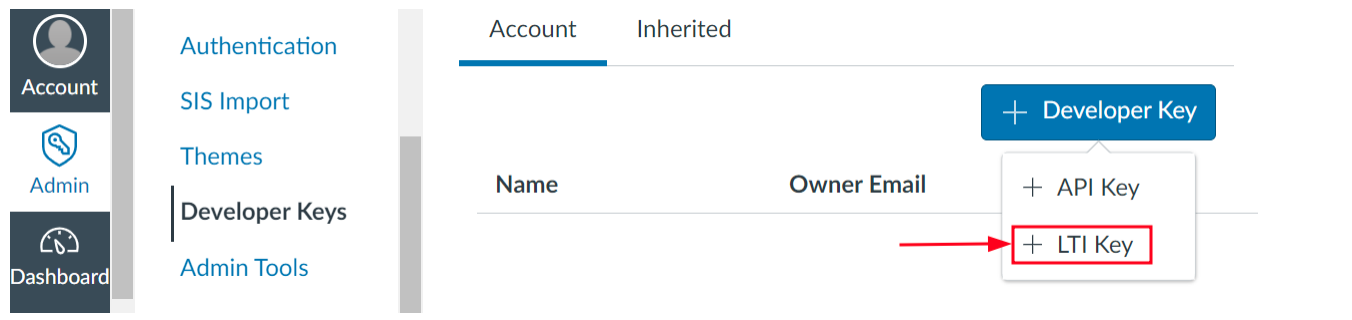
Select Admin -> Developer Keys
Click on Developer Key and select +LTI key.
(Step 6, Option 1) Using JSON configuration Url
You can use a JSON configuration URL to automatically configure most Canvas settings:
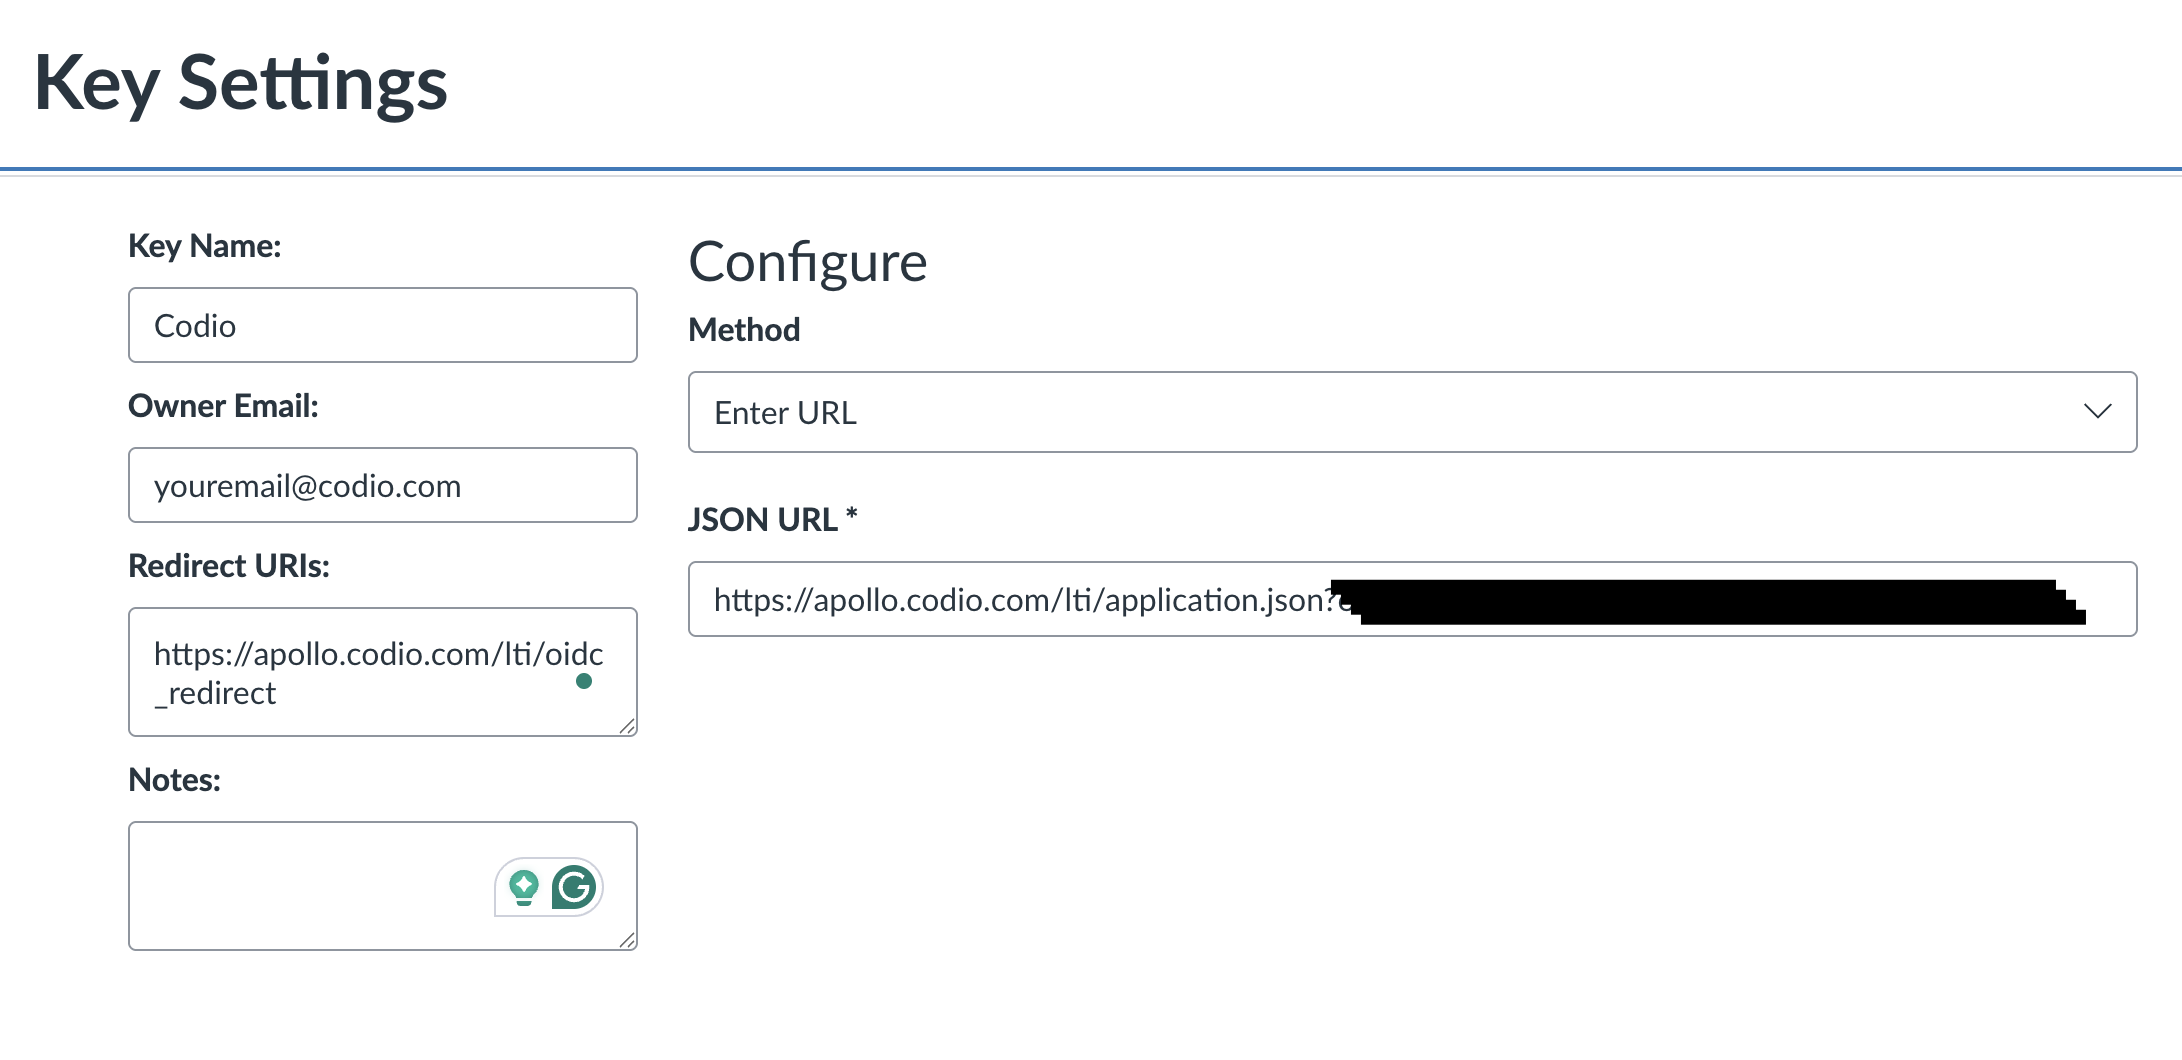
You only need to configure:
Value |
What to add |
|---|---|
Key Name: |
A name for the Tool, i.e.: “Codio” |
Owner Email: |
An email, you can use your own email. |
Redirect URIs: |
Paste the Redirect URL from your Codio integration |
Set the Method as Enter URL |
|
JSON URL |
Paste the URL from Canvas JSON configuration Url |
Click Save in bottom-right corner
You will be back at the list of developer keys.
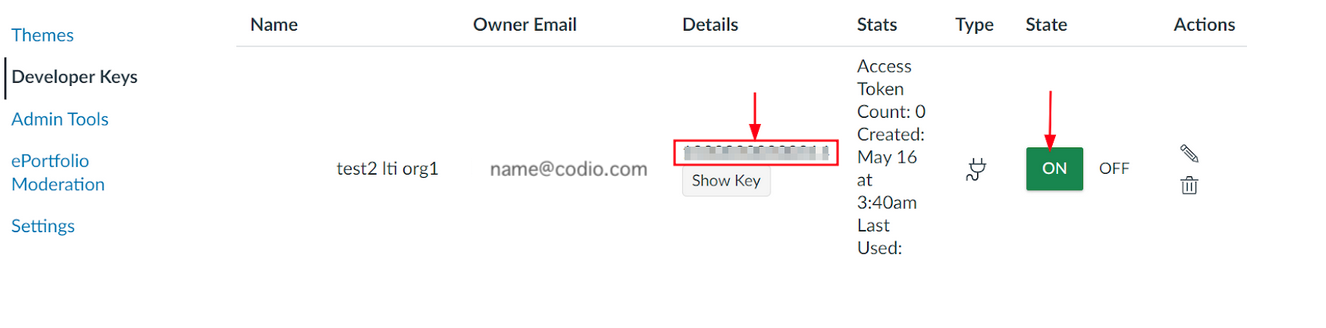
Update State to: on
Copy the number in the Details column (for use in Parts 2 and 3)
Note
If you use the JSON configuration URL method, skip to Part 2. To manually configure everything, continue with the steps below.
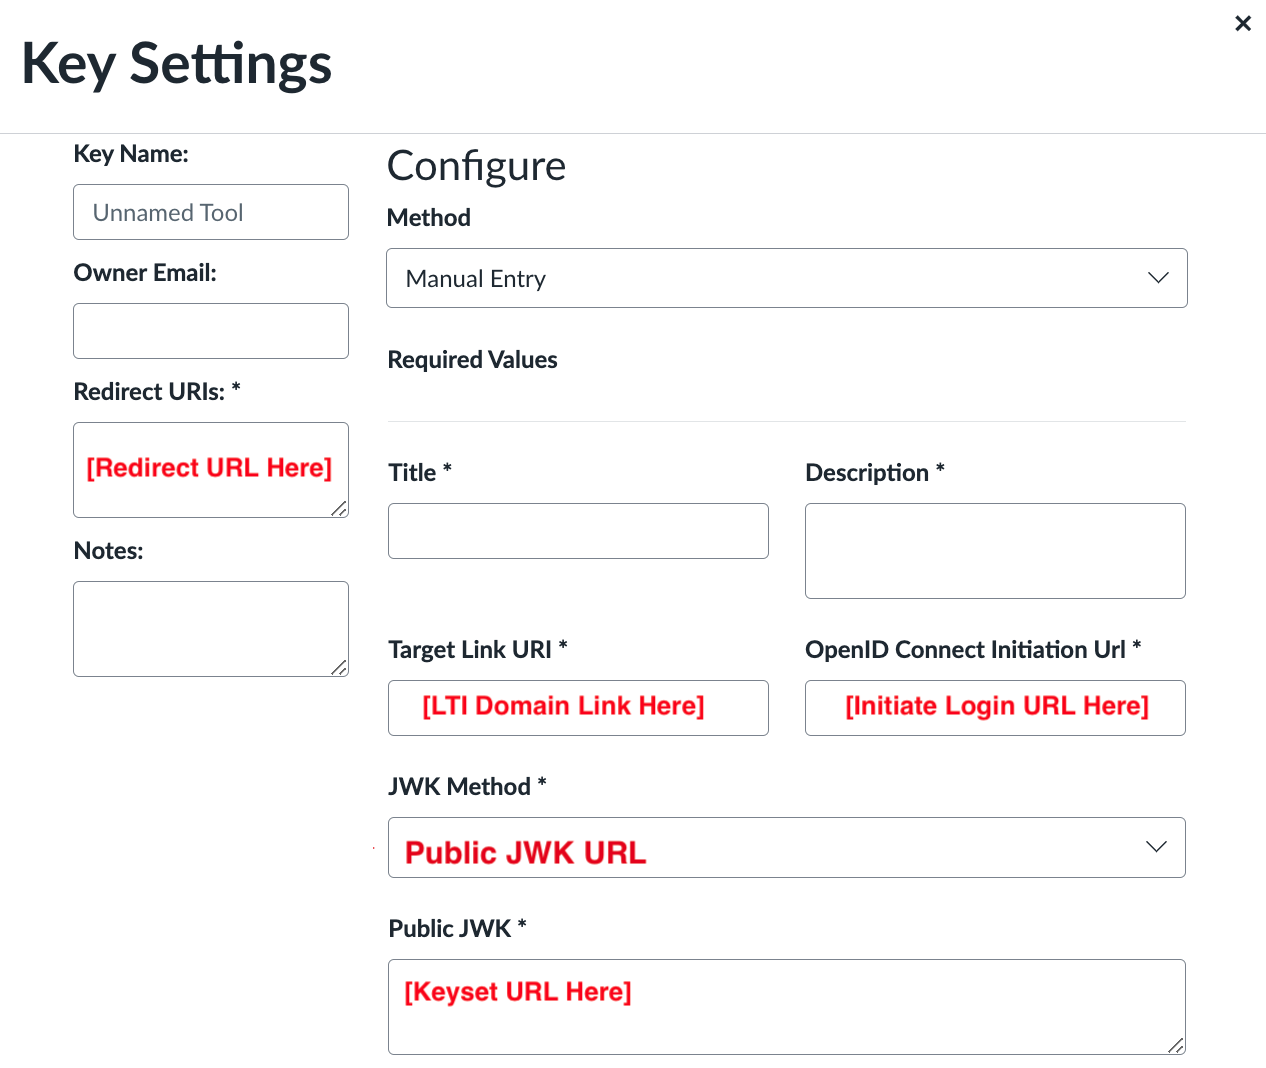
(Step 6, Option 2) Completing Canvas Steps Manually
Complete the Key Name, Title and Description fields. Make sure to set the method to Manual Entry.
Copy |
Paste |
|
|---|---|---|
7 |
From Codio, under LTI 1.3 Integration, copy the Redirect URL |
Paste it into the Canvas Redirect URI field. |
8 |
Copy the LTI URL |
Paste it into the Target Link URI field in Canvas. |
9 |
Copy the Initiate Login URL |
Paste it into the OpenID Connect Initiation URL. |
10 |
In Canvas, change JWK Method to Public JWK URL. |
|
11 |
From Codio, copy the Keyset URL |
Paste it into the Public JWK URL field. |
Expand the LTI Advantage Services section and enable the desired fields. Ensure all gradebook-related services are enabled for grades to pass back to Canvas.
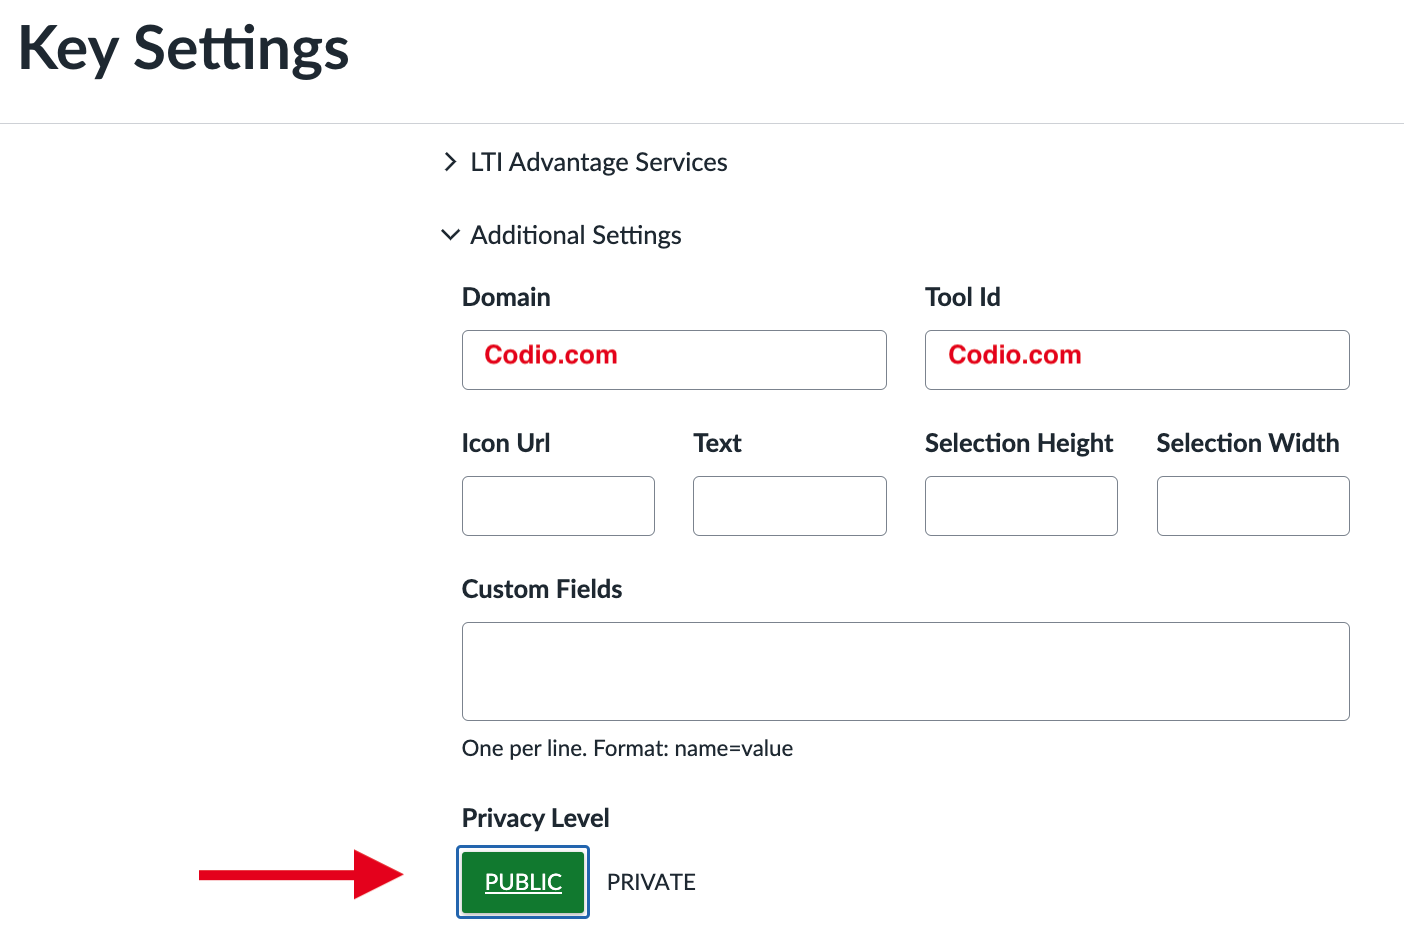
Expand the Additional Settings section.
Type “codio.com” in both the Domain and Tool Id fields.
Select the Privacy level as Public.
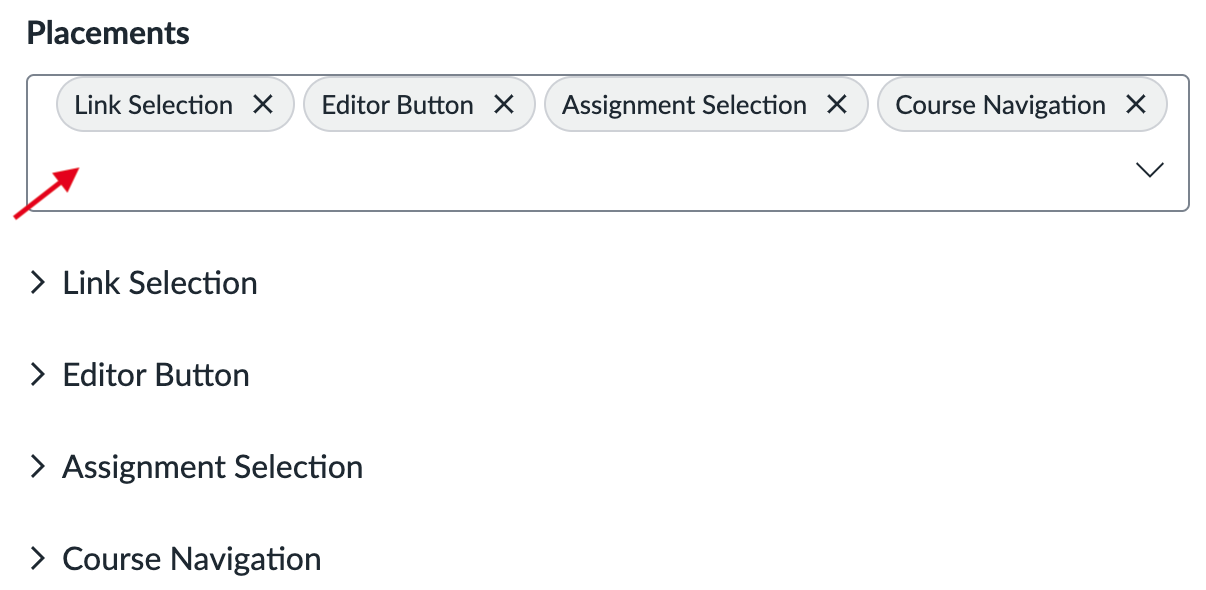
Scroll down to the Placements field. You can add a placement by starting to type the name and then selecting it when it appears. Placements that should be included (remove any others): Link Selection, Editor Button, Assignment Selection and Course Navigation.
Expand each field below and copy the static links provided. Each section has two steps—use the image as a reference guide to help you along the way.
Link Selection and Assignment Selection
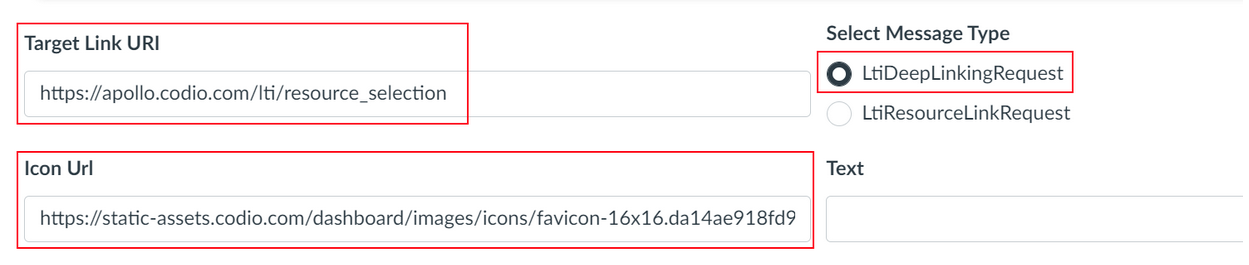
https://apollo.codio.com/lti/resource_selection
https://static-assets.codio.com/dashboard/images/icons/favicon-16x16.da14ae918fd9bc3b.png
Editor Button
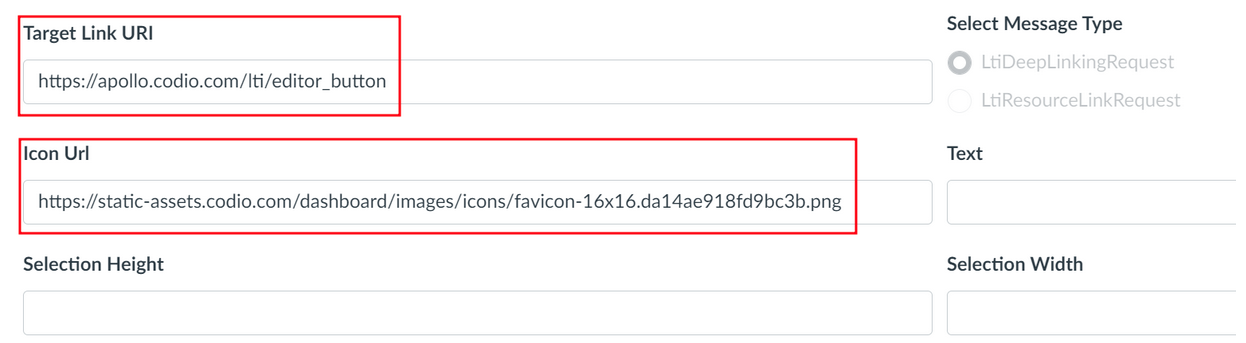
https://apollo.codio.com/lti/editor_button
https://static-assets.codio.com/dashboard/images/icons/favicon-16x16.da14ae918fd9bc3b.png
Course Navigation
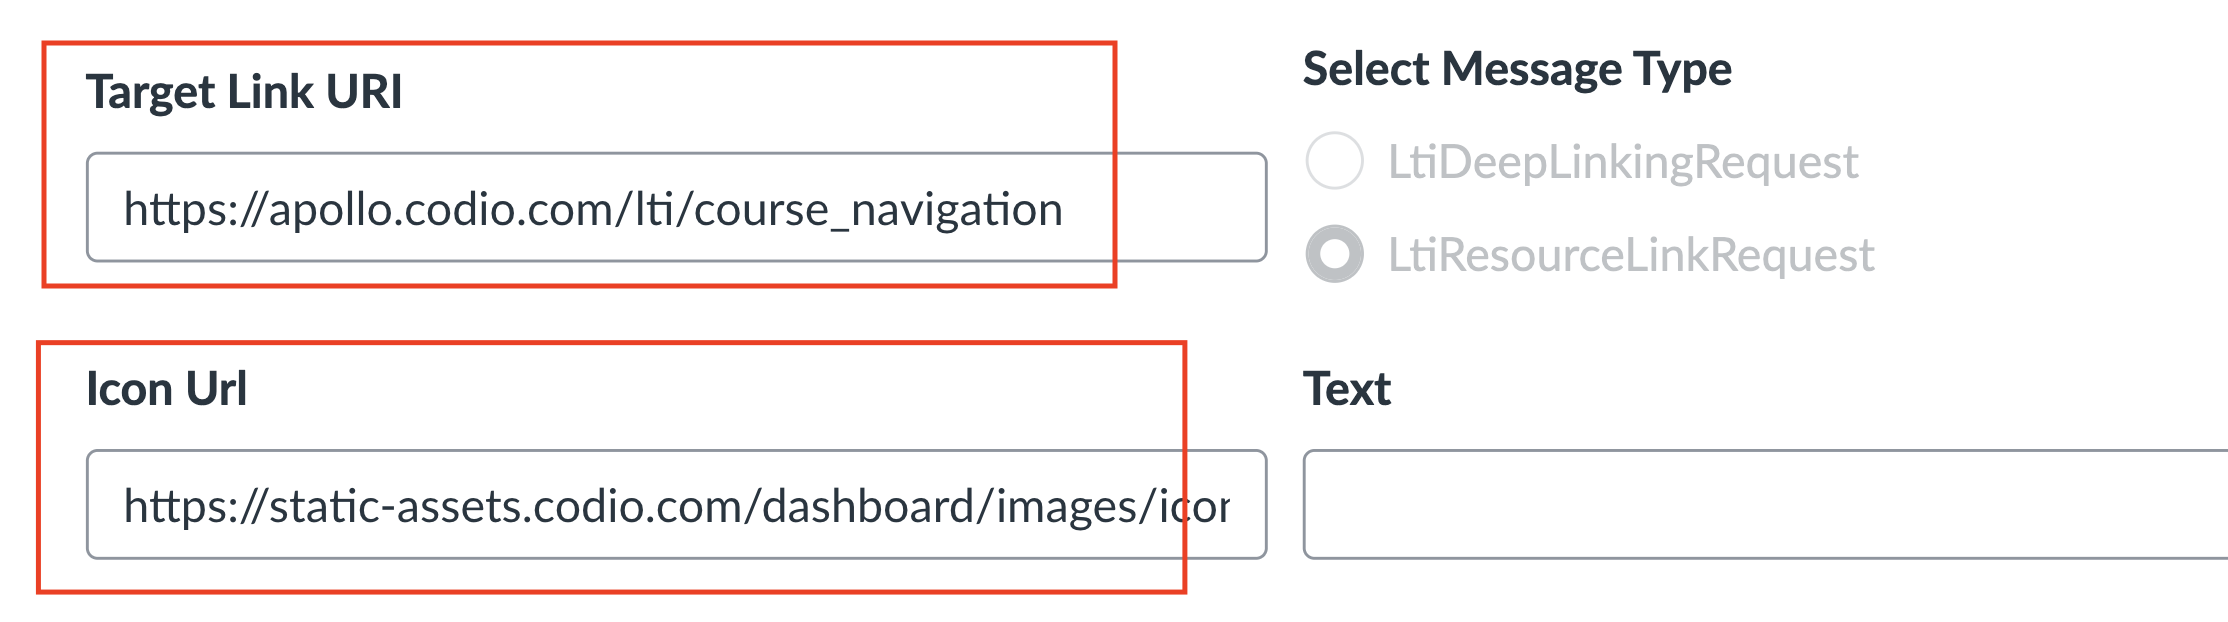
https://apollo.codio.com/lti/course_navigation
https://static-assets.codio.com/dashboard/images/icons/favicon-16x16.da14ae918fd9bc3b.png
Click Save in bottom-right corner
You will be back at the list of developer keys.
Update State to: on
Copy the number in the Details column (for use in Parts 2 and 3)
Part 2: Create an application in your course in Canvas
In Canvas:
Select an existing course or create a new course. Optional: create a test course called Codio Test Course before you do it with a production course.
In your course, go to Settings → Apps → + App
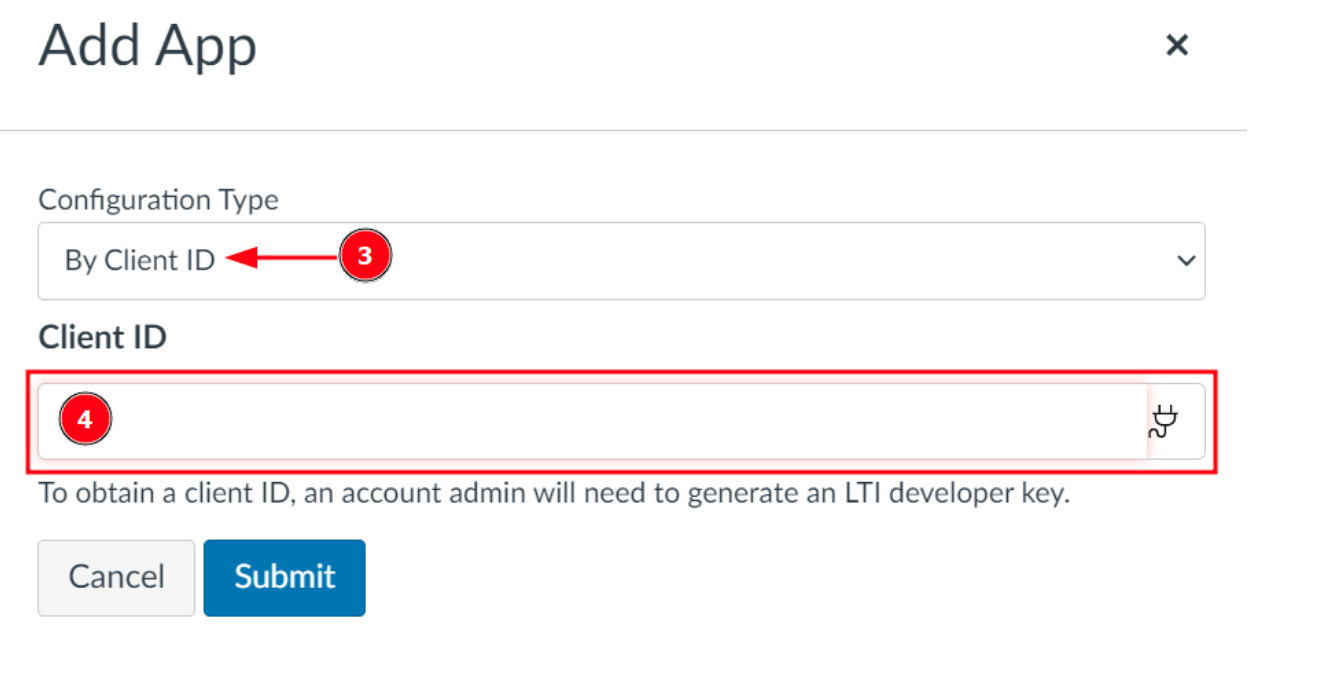
In Configuration Type, select: By Client ID
Paste the number you copied in Part 1 into Client ID field
Submit → Install
Part 3: Create an LTI configuration in Codio
In Codio:
In your org → LTI Integrations
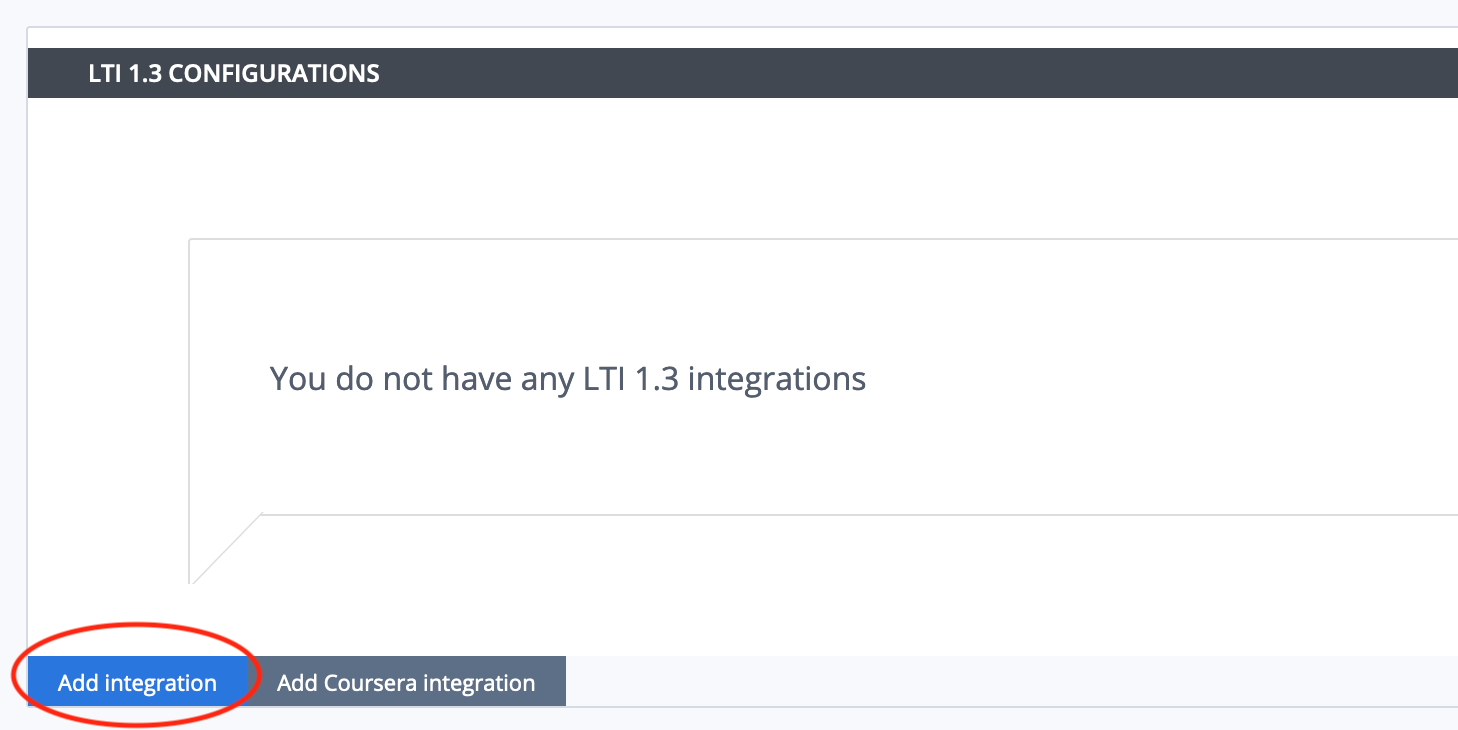
Scroll down to LTI 1.3 Configurations
Click Add Integration
Updating the fields in Platform Information
Note
Replace [CANVAS DOMAIN] with your institution’s domain in steps 5–7. Remove the brackets. Example: https://yourinstitution.instructure.com/api/lti/security/jwks
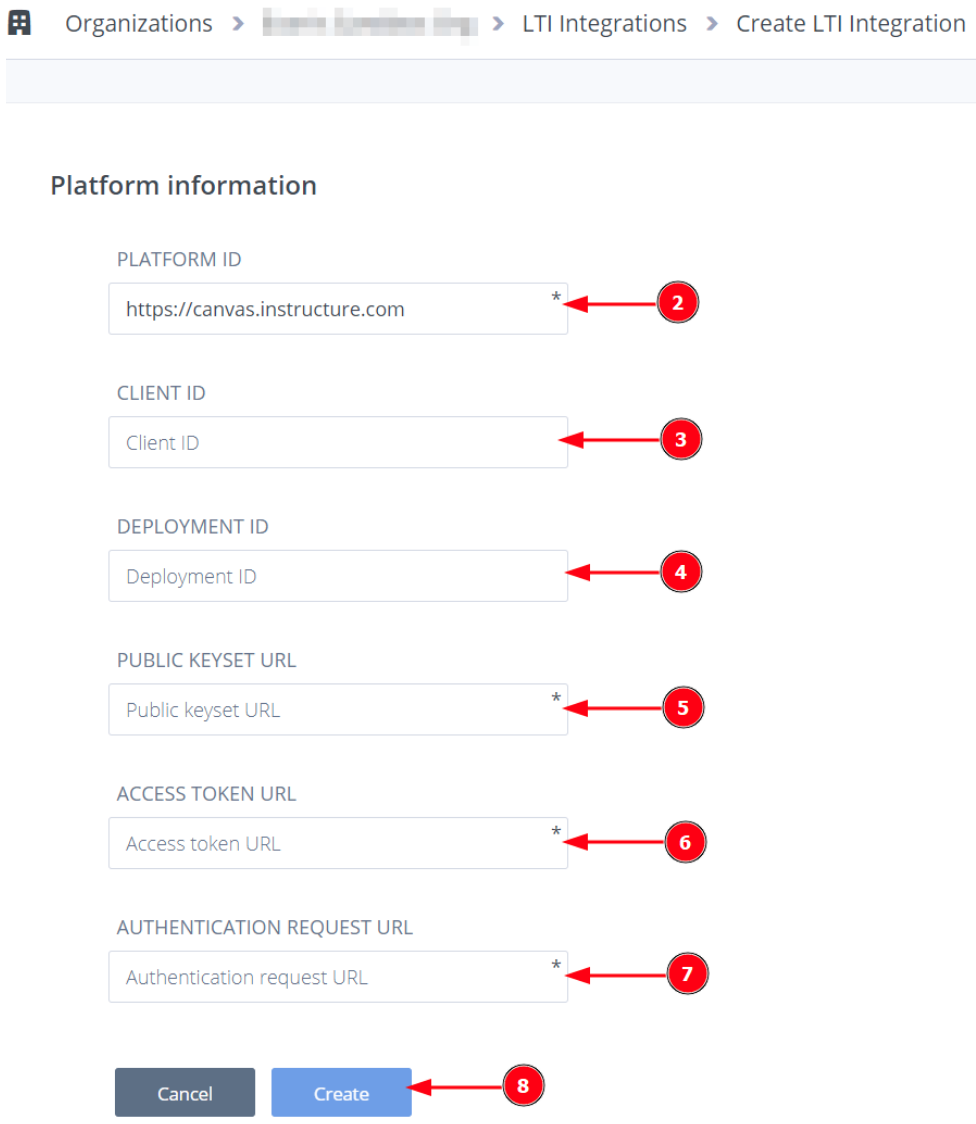
Platform ID:
https://canvas.instructure.com
Client ID: copied from Developer Keys at end of Part 1
Deployment ID: leave blank
Note
Leave the Deployment ID empty if you plan to deploy the LTI tool at the course level.
Public Keyset URL:
https://[CANVAS DOMAIN]/api/lti/security/jwks
Access Token URL:
https://[CANVAS DOMAIN]/login/oauth2/token
Authentication Request URL:
https://[CANVAS DOMAIN]/api/lti/authorize_redirect
Click Create
Part 4: Adding a resource
In Canvas:
Go to Assignments in your course, then click Assignment.
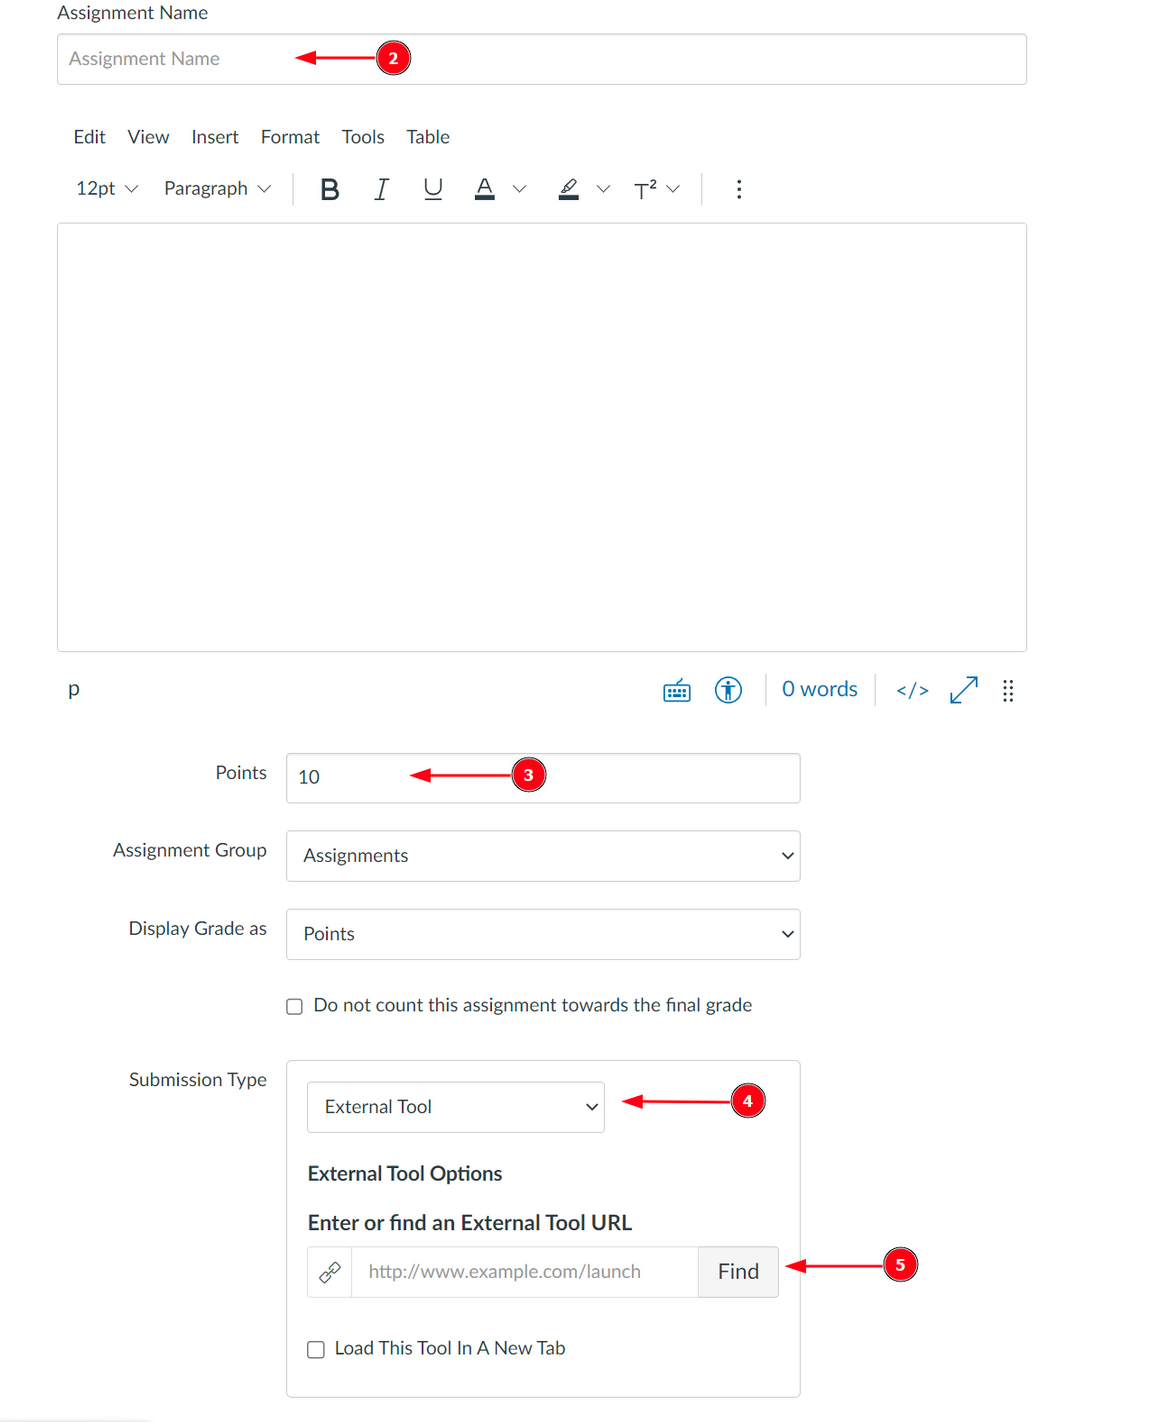
Give your assignment a name.
Select a number of points.
Under Submission Type, select External Tool.
Select Find.
Note
Do not paste the LTI Integration URL directly into the Canvas External Tool URL field when creating an assignment. Instead, use the deep link “Find” flow (recommended) or follow the “Connect by LTI Integration URL” method described below.
Select the tool created in Part 1.
Choose the Course and Assignment to connect to
Recommended: Select Load in a new tab
Select Save at bottom of the page.
Note
These settings are not final and can be edited in Canvas at a later time.
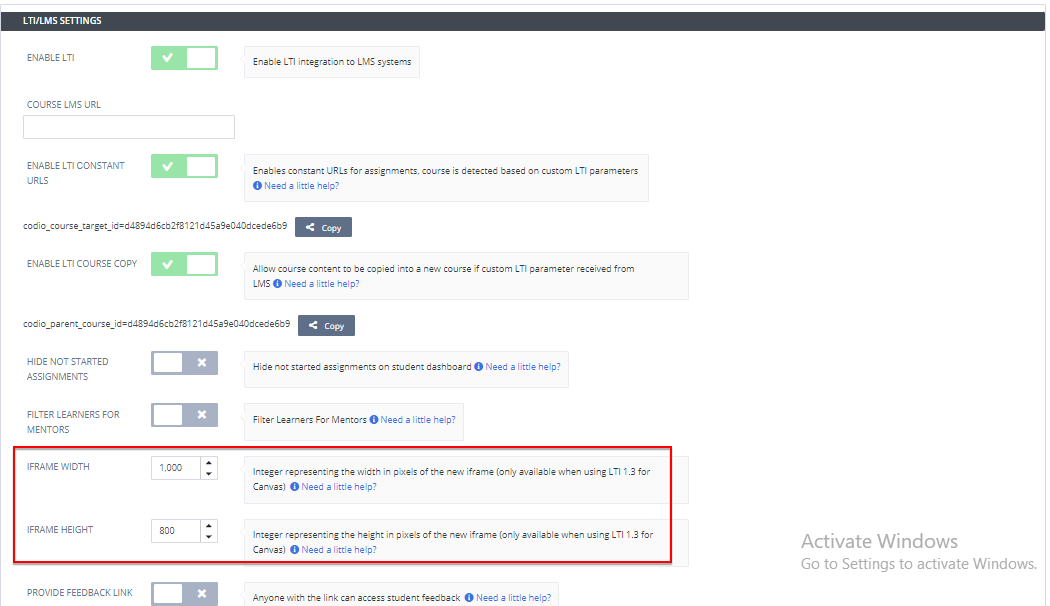
Part 5: Customizing Iframe Width/Height
You can customize the width and height of the Codio window embedded in Canvas. The default width is 1000 pixels and height is 800 pixels; change those values if needed and press Save Changes.
Important Notes on Course Copy in Canvas:
- In Canvas, once you copy the course, you must enter a unique SIS ID in Course Settings.
An SIS ID that is different from the Blueprint Course (Canvas’ Parent Course) is required for Codio to spawn a corresponding child course.
An SIS ID is optional for the Blueprint Course.