Custom Assistants for Virtual Coach
You can extend the current capabilities of Virtual Coach by adding your own custom assistants as JavaScript extensions. You will need a GitHub account to get started. If you don’t have one, follow the steps in the GitHub documentation.
Once you’re signed in to your GitHub account, you will be able to create, install and test your custom AI assistant with Virtual Coach.
Customize or Use an Existing Custom Assistant as a JavaScript Extension
Click this link to view the Codio Extensions GitHub repository and scroll down to the Repositories section.
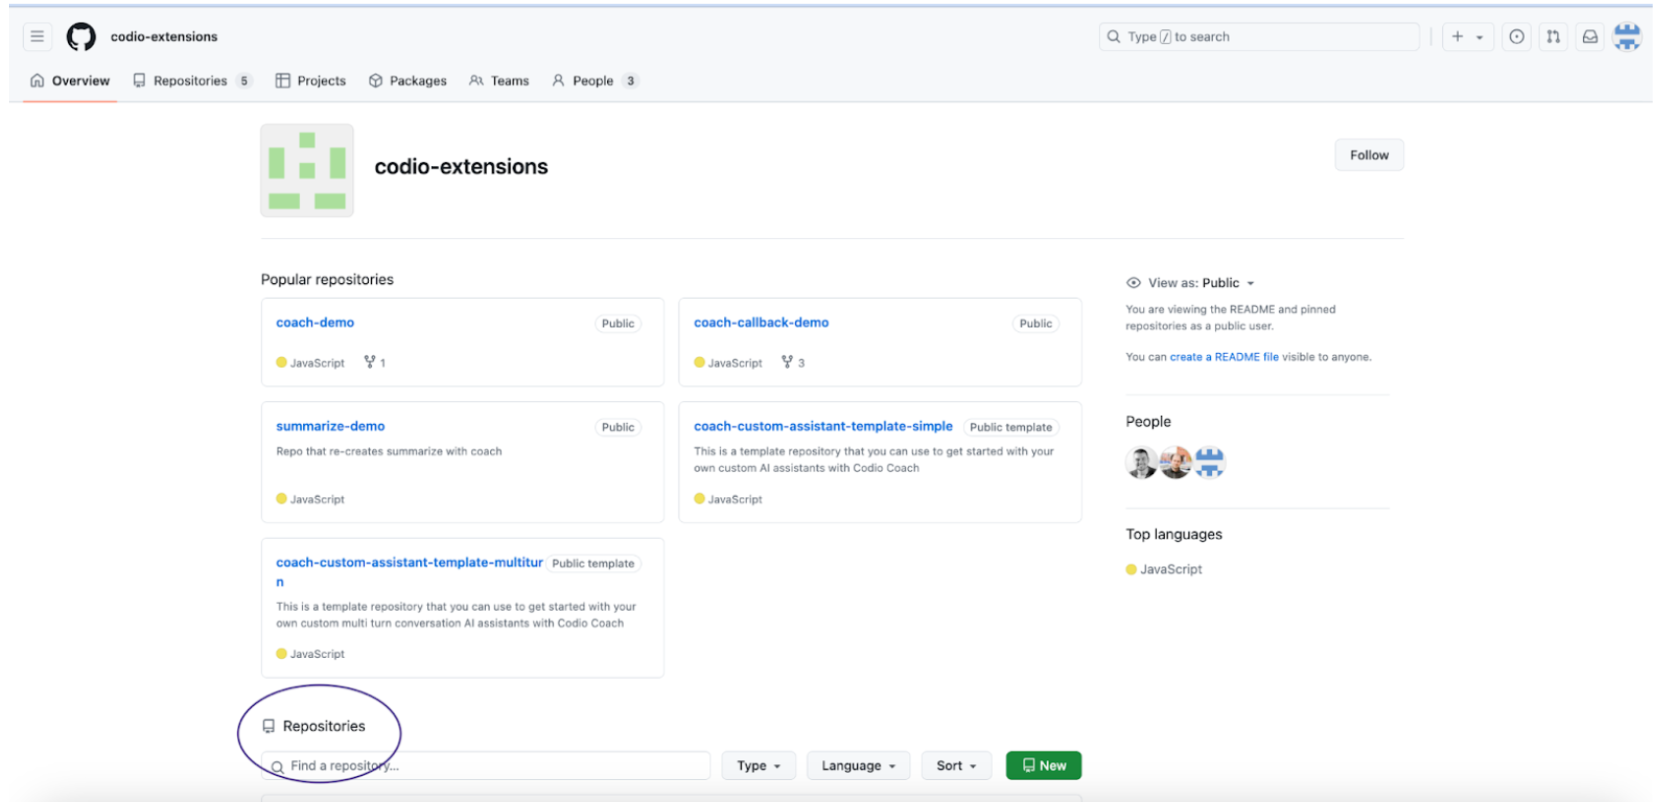
Choose one of the repositories that starts with custom-assistant-example-<example_name>
Note
These examples are experimental and may receive small improvements and updates. If you’re using them as is, please check the respective GitHub repositories for the latest release available.
- Click on the green Use This Template button or the Fork button in the top right corner to create a copy of the example repository. Give it a unique name—this will be your own copy of the custom assistant where you can make edits to the example code to customize your assistant.
- You’ll see two files in your repo:
metadata.json: This file will contain some basic information about your extension:name: The name of your extension - rename this field to describe what your assistant will do
type: For any Virtual Coach extension, the default value is “helper”
user_type: Describes who will be able to see the extension - one of 3 possible values: “learner”, “instructor”, “all”
component: For any Virtual Coach extension, the default value is “all”
index.js: This file will contain the JavaScript code for the extension.
Edit the
metadata.jsonfile (rename the extension, choose user_type). Save and commit the changes to your branch.Refer to the API documentation and edit the
index.jsfile with the JavaScript code for your assistant.
Creating a Release
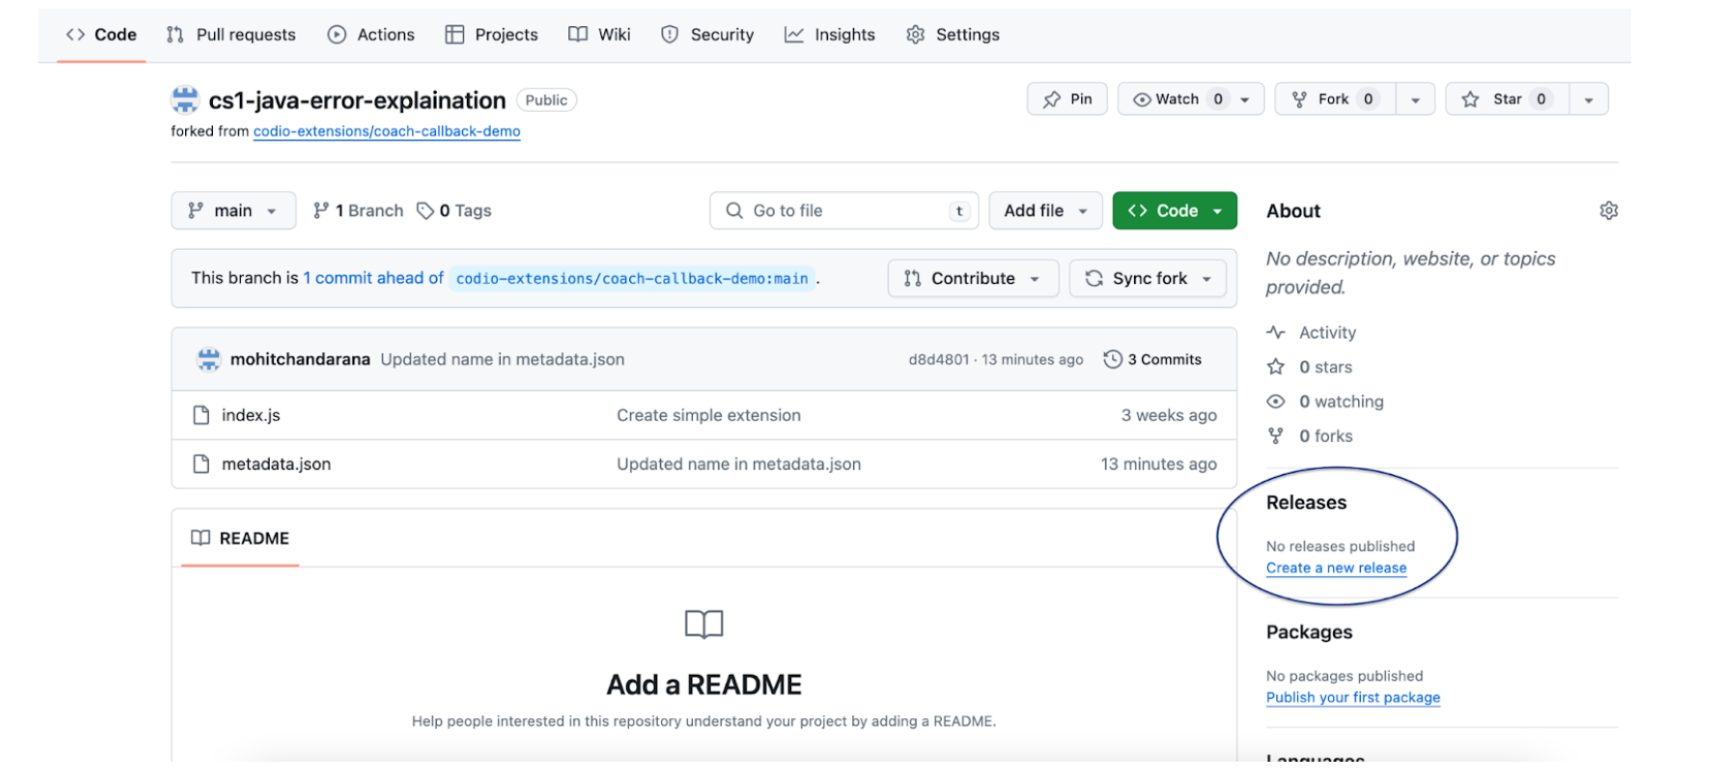
When the code for the extension is complete, you’ll need to create a Release for your repository, making it deployable and ready to use.
Navigate back to your repository and on the right panel, click on “Create a new release”.
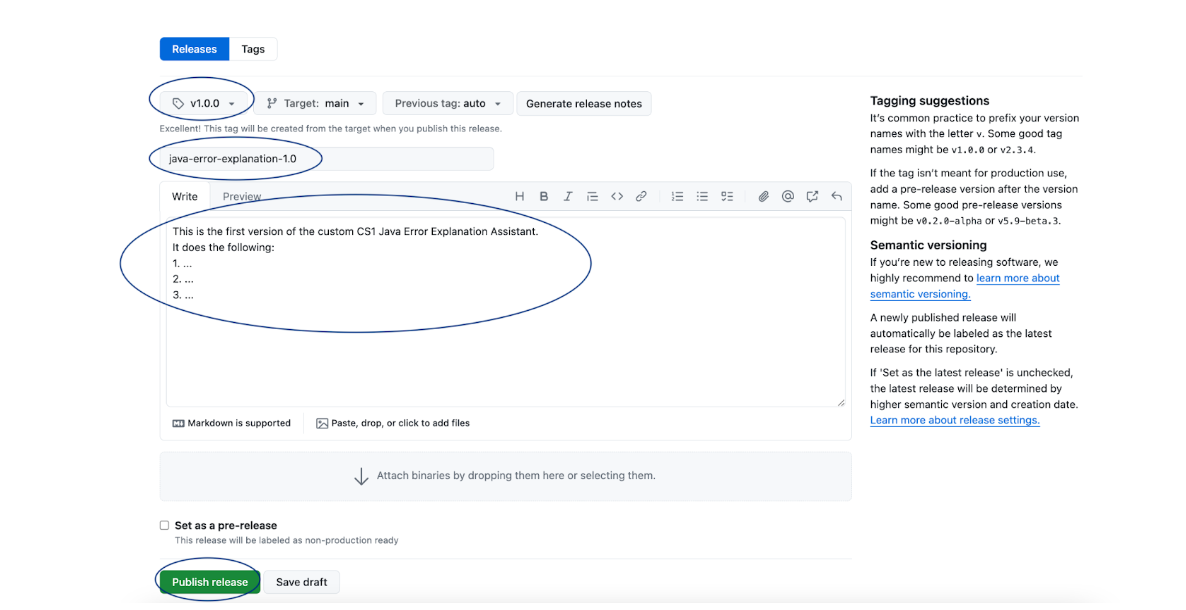
On this page, create a new tag in the tags field (refer to the tagging suggestions on the right panel for guidance). Enter a name and description for this release, and click the Publish release button at the bottom of the page.
Important
If you’ve made any changes, updates, or edits to your code files (index.js or metadata.json) after creating a release, you need to create a new release to propagate those changes to your custom assistant.
Deploying a Custom Assistant to Your Organization
Now that you have authored and tested your custom AI assistant, follow these steps to deploy it in your organization:
Navigate to your extension’s GitHub repository and copy the webpage URL: it should look something like this:
https://github.com/<your-github-username>/<extension-repository-name>Log in to your Codio account, and click on your username in the upper right corner and select Organizations from the menu.
Choose an Organization that you’re an owner of - this is how you’ll set up your assistant as an extension. If you’re not an owner, contact your Organization Admin to help you set it up.
Now click on Extensions, and then click on the Add extension button.
Paste the URL of your GitHub repository’s webpage that you copied in step 1, and click Ok. You should now see it pop up as an Inactive Extension. To deploy the assistant to your account, click the plug icon. Now it is active and deployed in your organization.
Note
This is an experimental feature. Adding an assistant to your organization will make it available to be toggled on or off in every course in that organization.
Applying Updates to a Custom Assistant After Creating a New Release
Once you’ve made more edits to your code files and created a new release, here’s how you can apply the updates to your assistant:
Log in to your Codio account, and click on your username in the upper right corner of your screen and select Organizations.
Choose an Organization that you’re an owner of - this is how you’ll be able to set up your assistant as an extension. If you’re not an owner, contact your Organization Admin to help you set it up.
Now click on Extensions. You should be able to see your Custom Assistant under Active Extensions.
Click on the Check for Updates button in the top-right corner.
If there are any updates to be applied, you will be prompted to do so.
Using Your Own LLMs in Custom Assistants via Codio’s LLM Proxy
You can use your own LLM (commercial or open-source) instead of Codio’s built-in Anthropic LLM by leveraging your Organization Level LLM API keys via Codio’s LLM Proxy.
Please refer to our documentation on adding LLM API keys to your Codio Organization and enabling it for a course. Large Language Models in Codio
Once the API keys are set up and LLMs are enabled in your course, refer to the Virtual Coach Custom Assistants API Reference to send requests and fetch responses from your own LLMs!
Testing Your Custom Assistant Using Development Mode
If you’d like to test your assistant before deploying it to your organization, you can use the Extension Development Mode to test it.
Navigate to your extension’s GitHub repository, click on the green Code button, then click on SSH and copy the displayed URL.
Now, go back to your repository’s home page, click on the
metadata.jsonfile and copy its contents.Log in to your Codio account, select My Projects from the Build menu and click the New Project button.
In the Select your Starting Point section, click Import and then paste the URL you copied in Step 1 in the URL field, and give your project a name in the Add Details section.
In the Select the visibility section, choose Public, and click Create. Your project will be opened.
Now, you should see the
index.jsfile in the filetree on the left. Right-click (or Ctrl-click) on it, and select Preview Static in the drop-down menu.This will open the file and display a URL. Copy this URL.
Go back to the homepage of your Codio account and click on your username in the upper-right corner of your screen and select Preferences.
Now click on Extensions at the bottom of the list, and scroll down to the Development mode section.
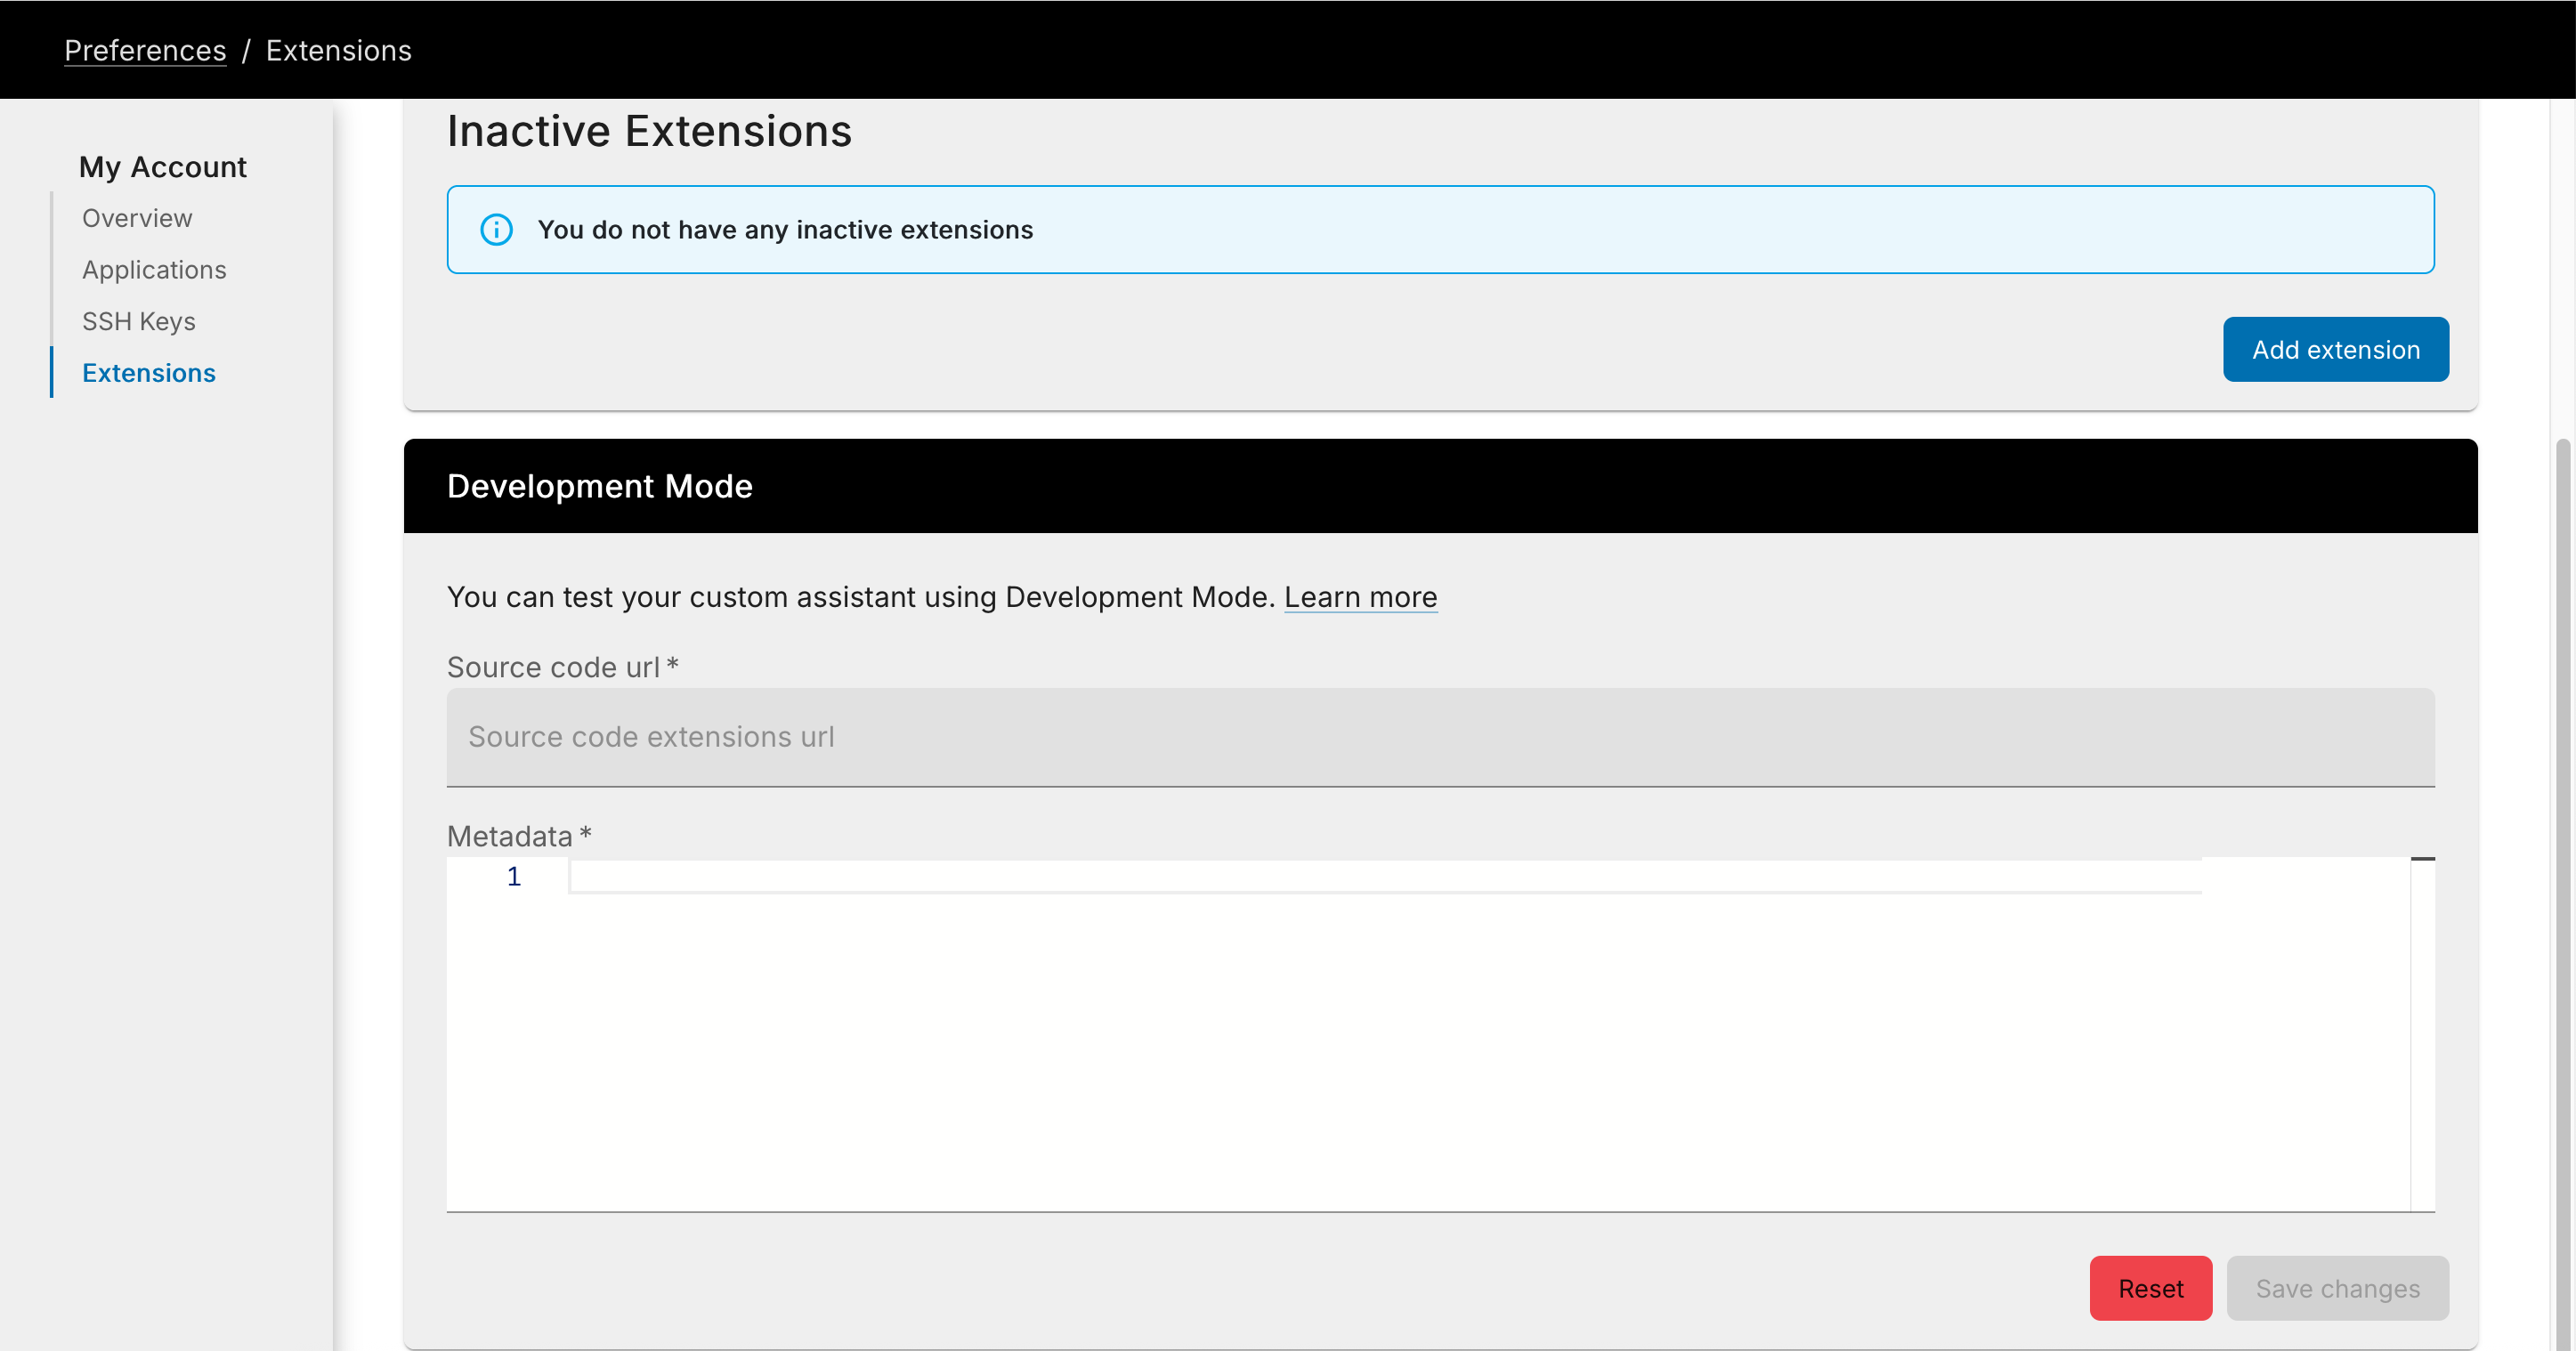
Paste the
index.jsURL that you copied in Step 7 in the Source Code URL field.Paste the contents of the
metadata.jsonfile that you copied in Step 2 in the metadata section, and click Save changes.
Now you can open any of your assignments or projects and your extension will be visible as a menu item in Virtual Coach. You can test and make changes and once you’re happy with it, create a release and deploy your assistant.
Note
By adding an extension to your account or testing it in Development mode, it will only be visible to you and not your students—regardless of the user_type in metadata.json. This allows you to test and refine your assistant before deploying it to your organization.